 by Steven D. Johnson
Racine, Wisconsin
This month:
•
Bits & Pieces & Reverse Designing
•
More Bits & Pieces – Charging Off
•
Even More Bits & Pieces – On The Block
•
Still More Bits & Pieces – Prototyping a New Year's Promise
•
Mobile Sanding Center – Drawer Fronts & Trim
Embarking upon a major project at this time of year, for me at least, is ill-advised… there are just too many diversions dancing in the sunshine. Once in the workshop and "in the zone" I like to stay "in the zone" --- an outdoor project and fair weather can distract me from the woodshop for days. Over the years I have found it to be better to utilize my summer shop time building small projects and using up some of the mounds of scrap wood that have accumulated. What follows is a sampling of small projects and helpful hints for designing to and creatively using your "bits and pieces" scrap woodpile. I hope you get some ideas!
Bits & Pieces & Reverse Designing
Click on any picture to see a larger version.
For a couple of months some scrap bits and pieces of cedar fence pickets have been perfuming my shop, leftover from the planters I quickly built as a gift (see the
July 2013 edition of Wood News Online
). But for the attractive scent, I may well have already disposed of those pieces. With three other projects underway in the Down To Earth Woodworking shop, I needed the space and the tranquility that accompanies de-cluttering my workspace.

|
Figure 1 - This was the photo I was
given along with the instructions,
"Make it something like this."
|
But I was asked (told, actually) to build a shoe rack, and those cedar bits seemed suited for the task. Now, like all good conspicuously consumptive consumers, I typically design a project with a wood species (or two) in mind and then acquire what is needed, secure in the knowledge that if I underestimate or really mess up a piece, additional wood is just a few miles or a few mouse clicks away. Designing a project to fit a finite stack of available wood is challenging and exciting. There literally is no going back. The process is what I refer to as "reverse designing."
I was shown a catalog and told, "Make it kind of like this." Looking at the page, I said, "It costs less than thirty bucks, just order it." The spirited conversation that ensued would be an interesting sidebar to this story, but suffice to say, the argument was lost and I got to work… and I am glad I did. There is something immensely satisfying, perhaps even noble, about creating something useful from scrap.

|
|
Figure 2 - The cedar scraps I started with
|
When reverse designing, the project must fit the wood available. With the stack of cedar and tape measure in hand, I started "noodling" through some sketches. More elaborate design ideas had to be tossed… there just wasn't enough wood. After several aborted attempts, there finally emerged a semblance of a workable idea.
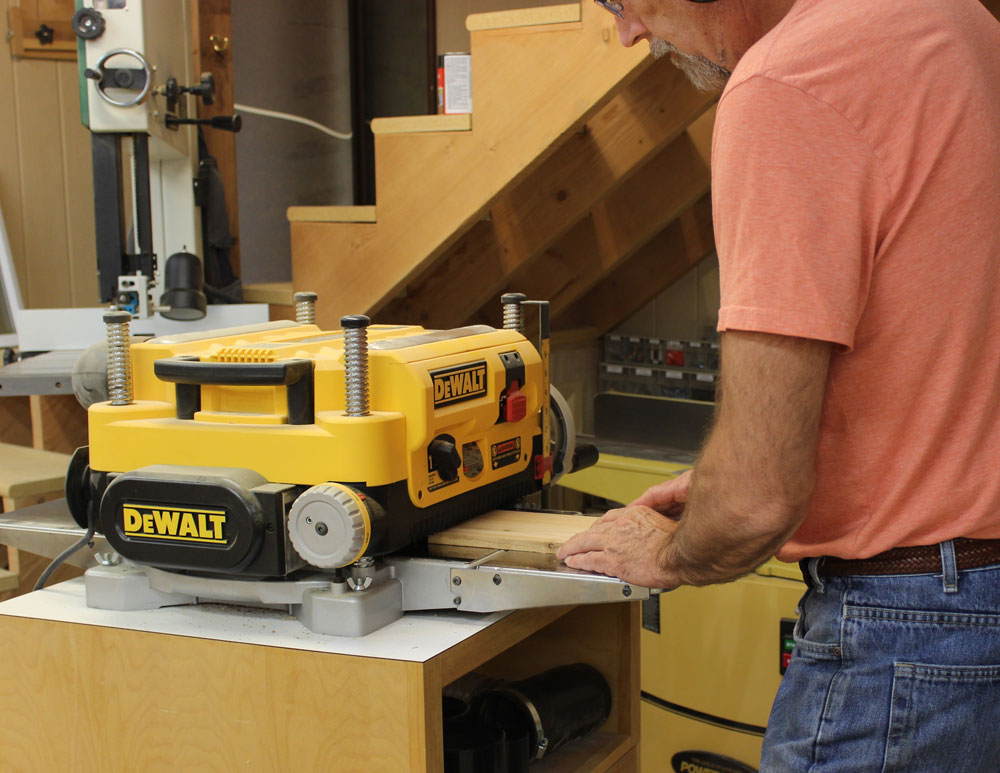
The rough-hewn cedar that was perfectly acceptable and maybe even preferable for an outdoor planter, would not do for an "indoor" accessory. The thickness planer made quick work of smoothing the rough surfaces but revealed even more flaws in the wood… knots, cracks, and splits. Some imperfections could be incorporated, some could be repaired, but some would have to be cut away, further reducing the stack of available wood. Complicating the situation, the material was now just slightly over one-half inch thick, and cedar being cedar, the lack of heft would limit my joinery options. I was beginning to wonder how and if I could pull this off.

|
Figure 3 - To avoid wasting any material on snipe, run pieces
end-to-end in a continuous stream
|
In the "go-by" photo the rails for the shoes were turned with their flat, wide dimension running horizontally. Because this shoe rack would hold some of my heavy size twelves, I decided to orient the rails vertically. The commercially available shoe rack was designed for flat, boxed, unassembled shipment. The rails fit into dados in the uprights and are held in place with a single screw. In my design, I decided to make notches in the uprights and glue the rails into place. In order to add a bit of additional rigidity and rack-resistance, I also decided to use larger sections of cedar as profile and brace pieces between the legs in the end panels rather than the thin arched cross-member used in the commercial model.
Before fully committing any of my precious scraps to the saw, I took some confirmation measurements. Four pairs of my shoes (the largest shoes in our family) lined up side-by-side would need a 25-1/2" space. Where the "boss" wanted to place the shoe rack, the overall length could be no more than 26-1/2", so that dimension seemed okay. In order to place and retrieve shoes from the rack easily, there needed to be at least six inches of height between each set of rails. A front-to-back distance between the rails of eight inches seemed "standard" on store-bought versions and would certainly suffice for storing shoes, but nine inches would give the unit more depth and likely make it more stable. We like to be able to vacuum under things, so I decided to set the first pair of shelf rails about four inches from the floor.
With measurements confirmed, I started by cutting the shoe-support rails. At 26-1/2" long, 1/2" thick, and 1-1/8" wide, and considering the requirement they be straight-grained and free of structural defects, these parts would necessarily consume the largest amount of leftover cedar. I used the very best pieces.
The next-best scrap pieces were used to make the legs for the end assemblies, since they, too, needed to be straight and relatively defect-free. I then cut four small panel pieces that would finish forming the end assemblies.
I used small pieces of double-sided tape, stacked the four end panel pieces together and at the band saw cut the curves. After smoothing the curves at the oscillating spindle sander I pulled the pieces apart, and one panel split right along a grain line. Wouldn't you know it? Carefully I painted a bit of glue on the two pieces and put the panel back together. Thanks to the large open-grain appearance of the cedar, the repair did not show at all.

|
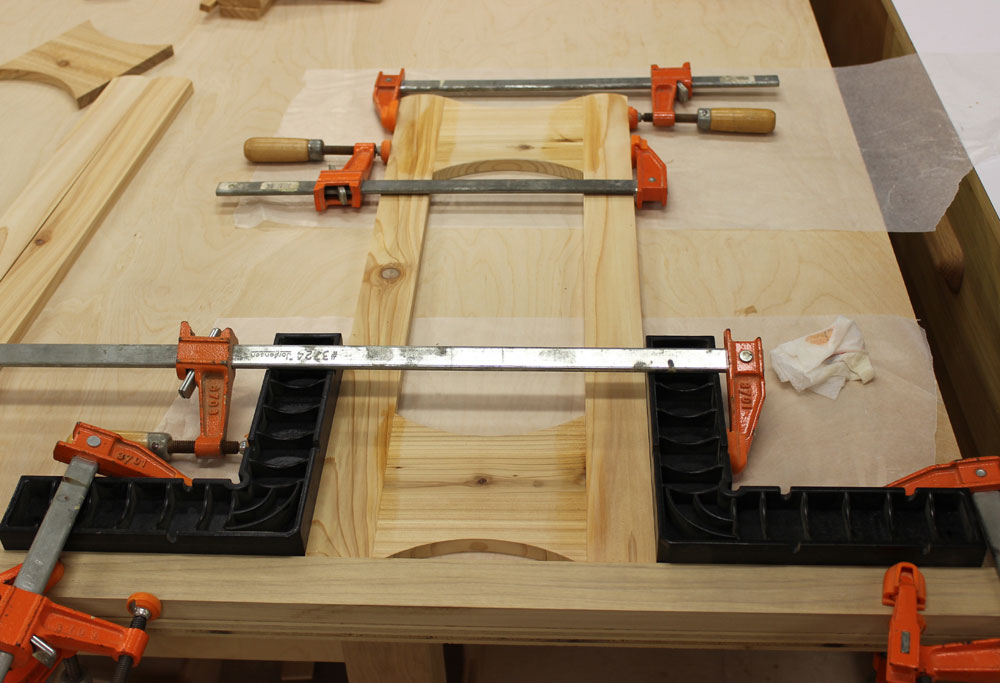
Figure 4 - A straight board at the bottom and two
corner braces make a nice squaring jig for glue-ups
|
The Festool Domino loose tenon joinery system is easy, fast, and relatively foolproof. I used the 5mm cutter and made matching mortises in the panels and vertical legs and glued up the end panels using 5mm X 30mm Dominos. I made a little squaring jig by clamping a straight scrap board and two corner braces to my work surface and assembled both end panels in this jig to assure they were square.
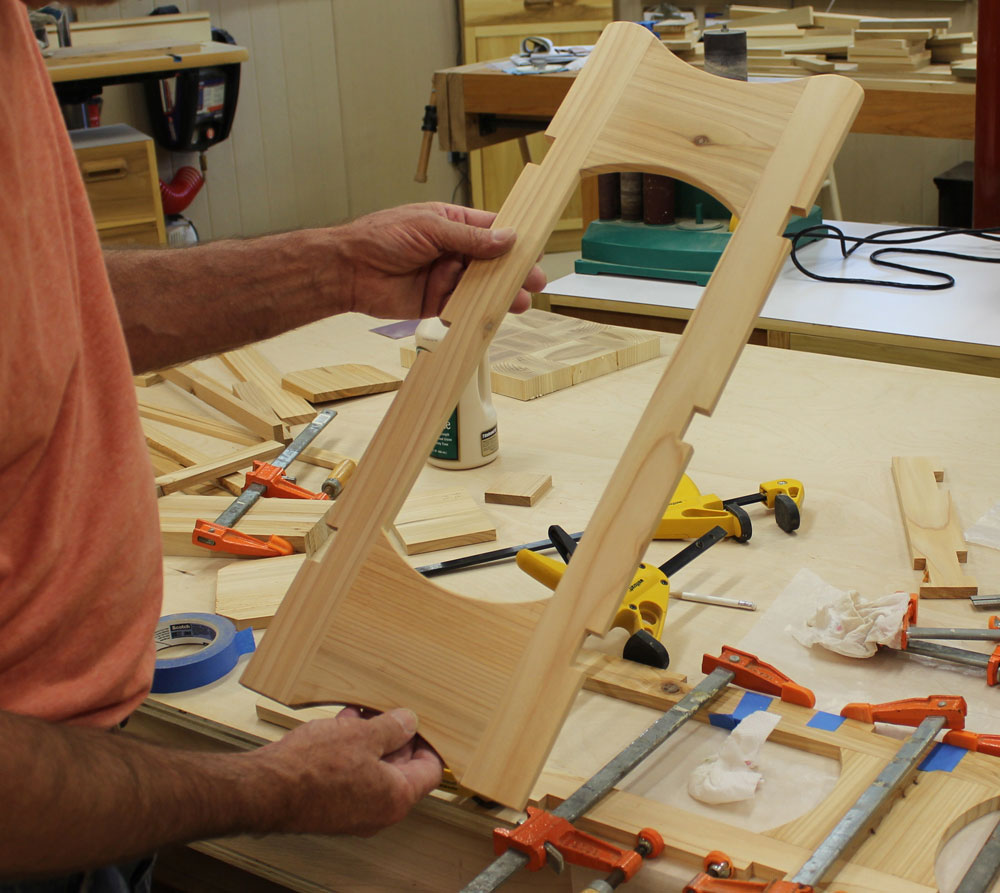
After the glue dried in the end panel assemblies I clamped the two together in registration and cut the notches for the shoe rails at the table saw. Too lazy to set up a dado blade, I set the starting point for the first cut with a block clamped to the saw's fence, just in front of the blade, then nibbled away with repeated passes until I got the notches to the correct width. Unfortunately, one of the legs in one of the end panels developed a crack. Again, with a little dab of glue, some painter's tape and a couple of clamps, I repaired that crack. You can see the repair in progress in the background of Figure 5.

|
Figure 5 - Finished end panel
with notches cut, edges eased,
and all surfaces sanded
|
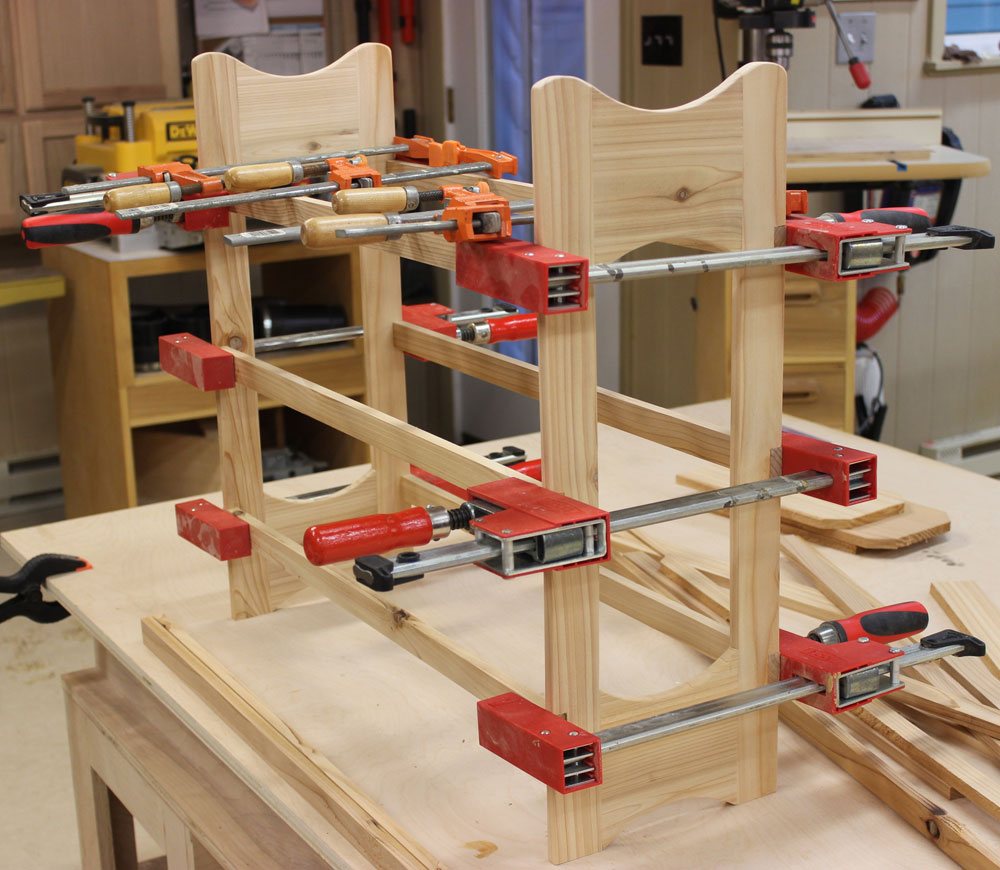
Because it would be easier to do it pre-assembly, I sanded everything, particularly what would be the inside faces of the wood. I eased the corners on all the boards and made sure all the notches and rails fit. Then I glued everything together and let it sit overnight. If you are wondering why those extra clamps are sitting on top of the assembled piece, it is because one of the legs was slightly off the work surface, probably due to some uneven clamping pressure or something slightly out of square. The clamps added weight to the top shelf while I loosened the other clamps… the one slightly "high" leg eased down to the work surface and I then retightened the clamps.

|
|
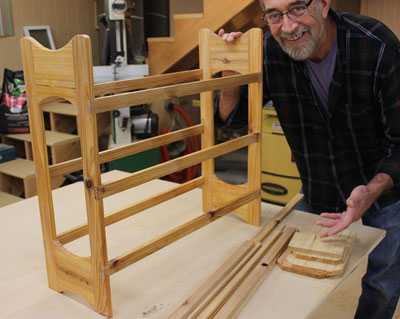
Figure 6 - The scraps are starting to take shape!
|
Cedar certainly smells nice, but the aroma goes away quickly, and I thought it more important to add a finish so the shoe rack would stand up better to wear and tear. I ragged on three coats of Watco Danish Oil, letting it cure a day between coats, then after three days of additional curing, applied a coat of Briwax and buffed it out to a satin sheen.
|
Figure 7 - A smaller scrap pile and a spiffy
new shoe rack!
|
Sure, we could have ordered the thirty-dollar shoe rack, but my scrap pile is now much smaller, we have a made-to-order shoe rack, it looks pretty spiffy, and I do feel a bit "noble," being all green and frugal.
(Page 1 of 5)
1
2
3
4
5
Next Page
Return to
Wood News
front page