by Steven D. Johnson
Racine, Wisconsin
(Page 4 of 5)
Previous Page
1
2
3
4
5
Next Page
Still More Bits & Pieces – Prototyping a New Year's Resolution
Click on any picture to see a larger version.

|
Figure 20 - Down To Earth Coffee - the
simplest way really is the best way
|
No offense intended, but I am willing to bet a shop full of tools that the vast majority of our readers have never experienced a really good cup of coffee. An excellent cup of coffee has absolutely nothing to do with high-priced equipment, and has everything to do with technique. The cleanest, purest, and best cup of coffee is also the simplest and least expensive way to brew… the "pour over" brew method.

|
|
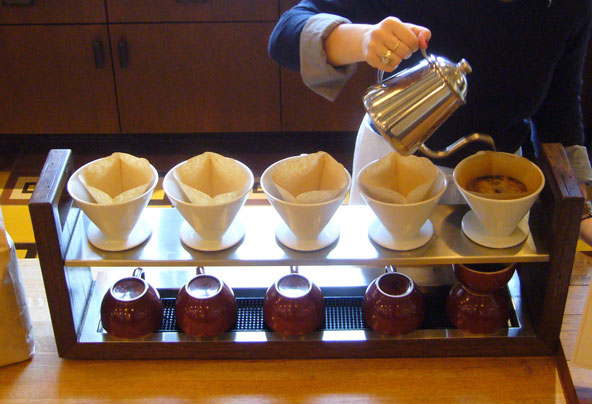
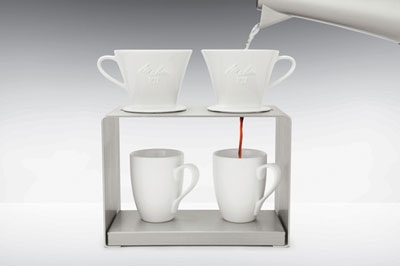
Figure 21 - A commercially available
pour over coffee station like you might see
in a coffee shop
|
Figure 22 - A rather "utilitarian"
looking double pour over station
|
Pour over coffee brewing is amazingly straightforward. A filter holder, a filter, fresh ground coffee, and water at the correct temperature are all you need. Slowly pour water over the grounds and the coffee drips into your waiting cup below. No machines, no noise… just coffee. Pour over brewing has enjoyed a bit of resurgence of late, and some local coffee shops are now performing "pour overs" for rapt customers. If a local coffee shop is serving pour over coffee, give yourself a treat and enjoy one.
|
|
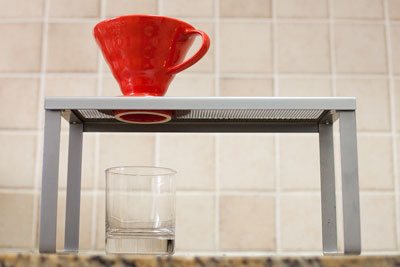
Figure 23 - An even more "industrial" look
|
Coffee shops often have commercially available or custom-made "pour over stations" where customers can sit and watch their coffee being made. Pour over stations for home use are rare, hard to find, very expensive, and mostly pretty ugly (utilitarian). I have wanted to make a nice pour over station for a while, but once I do, I know about a dozen coffee-addicted friends will want one, too. Realizing that any final design may well need to be "mass-produced" (if you can call a dozen of anything mass production) I decided to make a prototype.
Prototypes are extremely useful. A prototype can help refine a design, can help you spot errors or envision improvements, and can help define fabrication and assembly procedures. Prototypes are also a great way to use scraps of "lesser" material – obviously you won't want to use that figured maple, spalted hackberry, or quilted makore for a prototype!
Without a sample, picture, or plan, and having seen only a few "industrial" examples, I was literally starting with a blank page in designing a pour over brew station for home use. The first thing I did was to establish some basic dimensions.
|
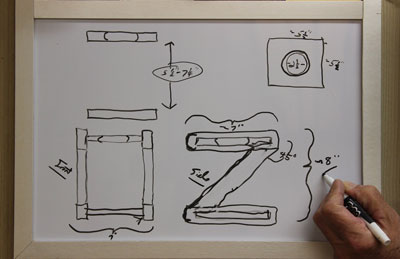
Figure 24 - At the "Doodle Board" working out
a rough design idea
|
The pour over filter holder I use most is the ceramic Hario V60 (about $20). The flat bottom of the filter holder has a raised 2-3/8" diameter ridge surrounding the hole where the coffee drips through. I decided a shelf with a 2-1/2" hole would work – the Hario would nestle into that hole and sit level and firm. I also decided that I would make the pour over station tall enough to accommodate either a coffee mug or a pretty little glass decanter underneath to catch the coffee as it drips through. With these couple of dimensional constraints, I started sketching and doodling, aiming for a pleasing design and a little visual interest.
A pour over stand needs a base on which to place a cup, a "shelf" (for lack of better terminology) to hold the filter holder, and something (the sides) to hold the two pieces together. I decided on a "Z" shape for the sides, though it could have been pillars, a solid piece of wood, or some stylized shape. After settling on a sketch, I drew the "Z" design full size and checked the angles, the height, and the front-to-back dimension to see if it would work. Anxious to get going, I started cutting out parts.
The side supports were first. I had scraps of poplar that were about right, but ran them all through the table saw to make sure they were exactly the same width. I then cut the angles at the miter saw. I set up a little clamped-together temporary jig made from scraps to assure that the upper and lower horizontal parts of the "Z" were parallel, and glued up the side assemblies. While those were setting up, I grabbed a couple more scraps of poplar and cut two square pieces 5-1/2" X 5-1/2".
|
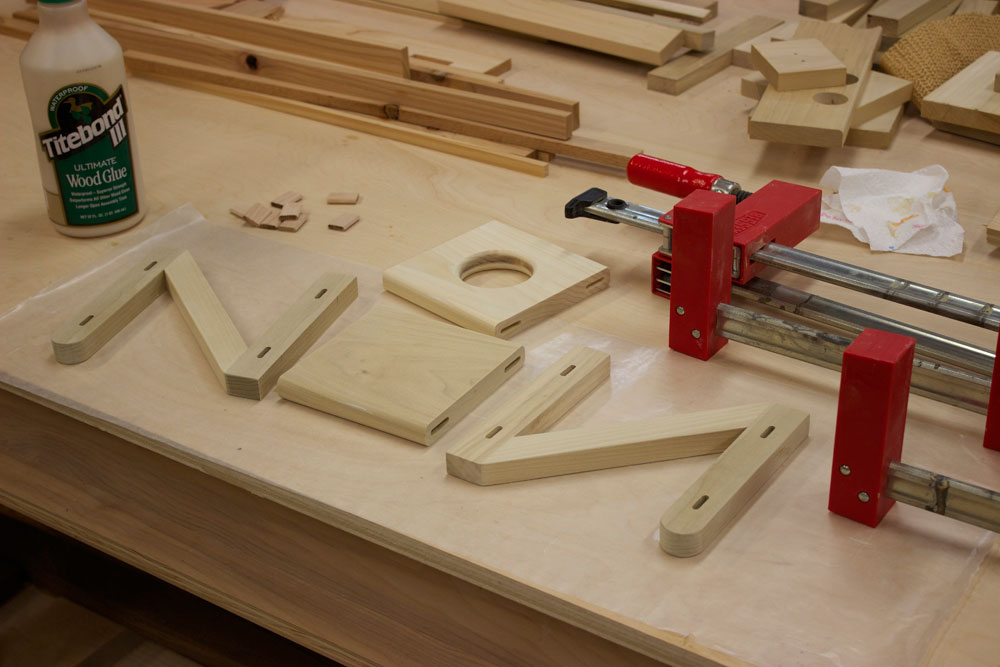
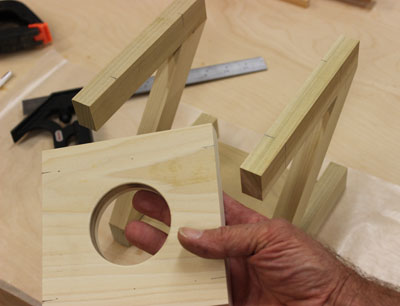
Figure 25 - The "Z" sides and top shelf
marked for mortises... note the burn marks
on the inside of the hole!
|
On one of the square blocks I drew lines from corner to corner to find the center, and went to the drill press to make the 2-1/2" hole. Unfortunately I did not have a 2-1/2" Forstner bit, and the only drill bit I could find was a hole saw – you know, the one plumbers use when they are drilling a hole through your floor to run a drain pipe. Even in the drill press, it made a nasty hole, burned the edges, and was generally pretty disappointing. A valuable prototype lesson learned – order a Forstner bit the correct size!
|
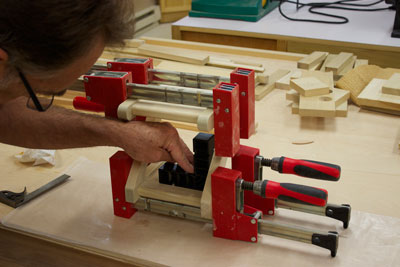
Figure 26 – "Z" sides clamped to a block in order to
make the mortises with the Festool Domino... I will
need a better, more secure way to hold these in
"mass production"
|
As soon as the "Z" legs were dry enough, I made a quick template and marked out a bullnose curve on the front end of the top legs of the "Z". I nibbled off a bit on the band saw, and finished up on the oscillating spindle sander. I think for a more repeatable and faster "production" run of these parts, I will make a better template and use a straight bearing-guided router bit to round the ends.
In each of the square pieces I marked out four mortise locations and made matching marks on the base and the shelf. I wanted the base and the shelf to be centered vertically on the side members, and the Domino system makes that easy. Just dial in the width of the work piece and the mortise will be in the center. Use your metric ruler, of course!
Making the mortises in the shelf and base was easy. But to make the mortises in the "Z" shaped sides, I had to clamp them vertically to a scrap piece. In a "production" scenario, I would either cut the mortises before assembling the sides or make a jig to add some additional support to the Festool machine while making the cut. It is very important that these mortises be perfectly straight.
After all the mortises were cut, I rounded over the front and back edges of the shelf and the base. I did this with a handheld router, but in "production" mode, I would set this up for the router table. I also rounded over the top and bottom edges of the 2-1/2" hole in the shelf. I sanded all the pieces and eased all the edges except the very bottom of the "Z" legs.

|

|
Figure 27 - Mortises cut, edges eased,
all parts sanded... ready for glue-up
|
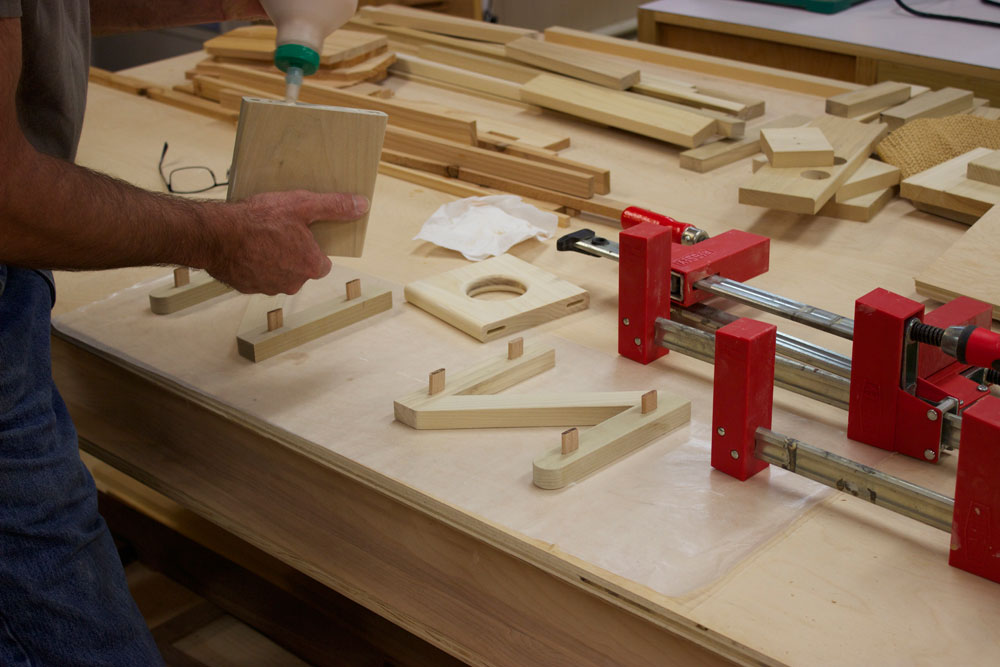
Figure 28 - The domino system
makes for easy glue-ups
|
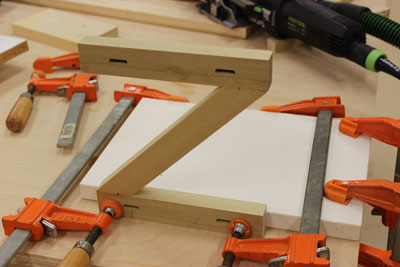
The glue-up was very easy. Once assembled, I added some clamps and checked that everything was square. A short while later I was able to remove the clamps, add the Hario filter assembly and the glass decanter, and make a cup of coffee. The coffee was great, but the design needs a little refinement.
|
|
Figure 29 - After clamping, check for square
|
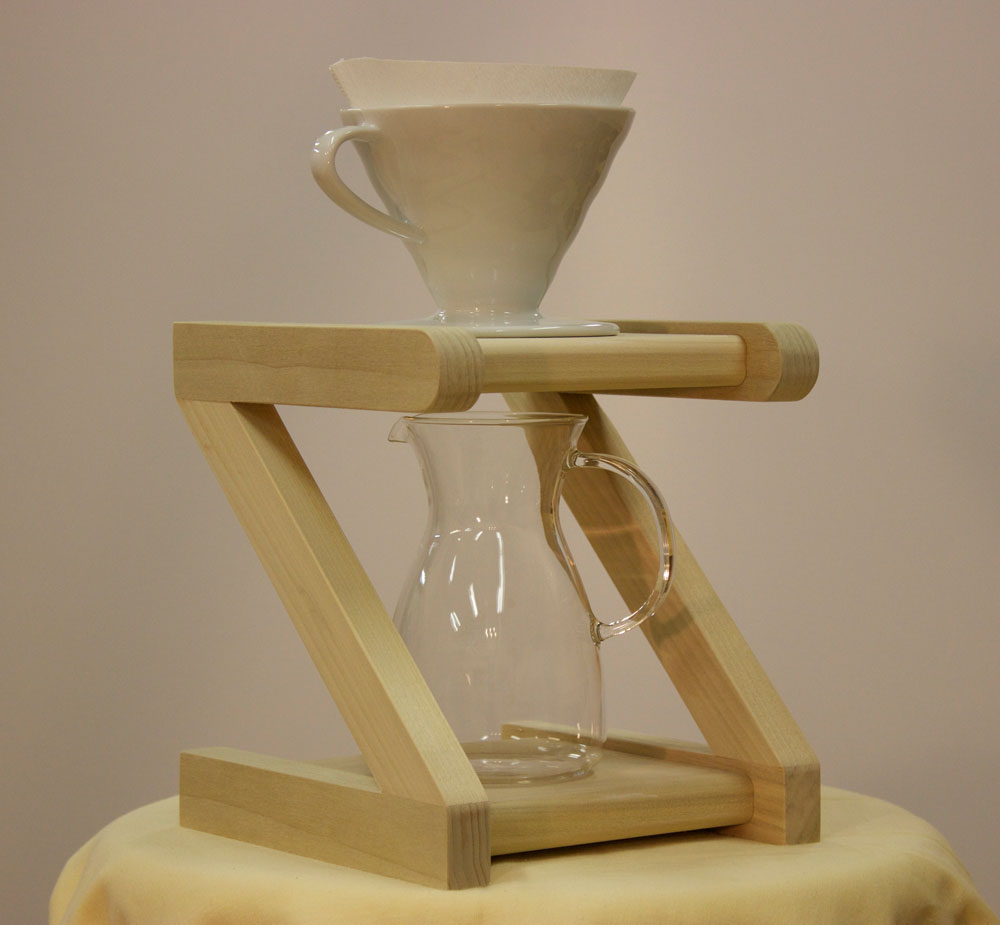
The height between the shelf and the base needs to be a little greater. I would like to produce a flattened concave area in the center of the base so that locating the cup or decanter is easier (wouldn't want to drip coffee outside the cup!). I also would like to make the roundover on the hole in the shelf a little more pronounced. My prototype is helping me to refine the design and pointing to quicker and more accurate jigs and methods for fabrication and assembly. My scrap pile is getting smaller, and my work is getting better.

|
Figure 30 - Not bad for a prototype...
certainly workable, but some
changes are needed
|
Perhaps most importantly, my prototype pour over drip coffee-making stand allowed me to finally (we are already well into the second half of the year!) tick off one of my thirteen New Year's resolutions. I had vowed to somehow combine my love of woodworking and my love of coffee into a project. The other twelve resolutions I made? I'm at about 50%. But before you judge me, how are you doing on yours?
(Page 4 of 5)
Previous Page
1
2
3
4
5
Next Page
Return to Wood News front page