 by Steven D. Johnson
Racine, Wisconsin
This month:
•
A Horizontal Pipe Clamp Rack
•
Random Acts of Woodworking
A Horizontal Pipe Clamp Rack

|
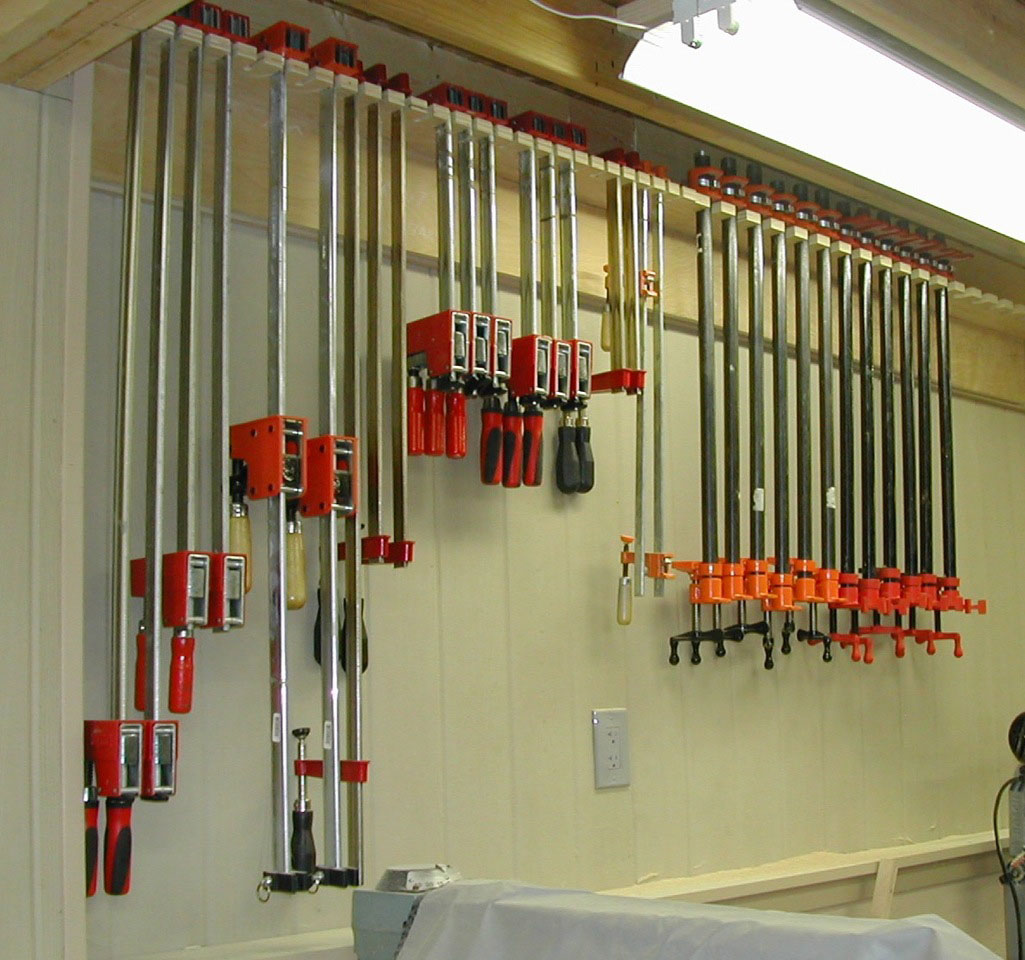
Figure 1 – No way to hang longer pipe clamps
and these were hard to reach.
|
Note: click on any picture to see a larger version.
Through trial, error, and use, tools and accessories that are used most frequently seem to wind
up being closest to hand. Whether you store things on the wall, in a drawer, or on a shelf, the
"stuff" you use most will usually wind up on top or in front. I always thought clamp storage could
benefit from this natural "5S'ing" process (
click here for hints on using the "5S" process to organize your
shop
).
For years my old clamp racks worked pretty well. But in my new shop, where the pinch cleat had
to be mounted high on the wall, the clamps were hard to reach and due to space restrictions at the
top, I had to hang them from the movable clamp face rather than the screwed-on crank-handle-end of
the clamp. The arrangement seemed a bit insecure.
In my particular situation, I had another problem with vertical wall hanging for clamp storage
--- some of my pipe clamps were simply too long for the space and would hang down over the ledger at
the top of the concrete block portion of the wall and others would hang over electrical outlets.
Horizontal storage seemed like a viable alternative.

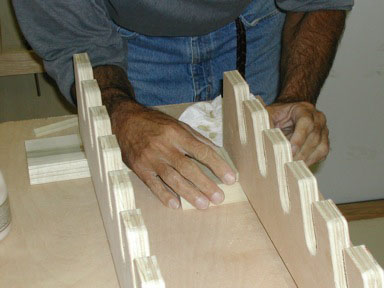
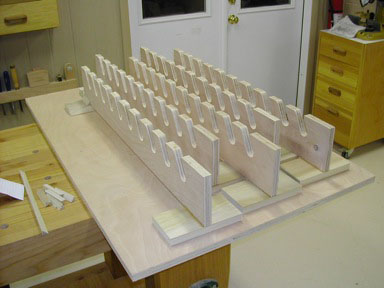
|
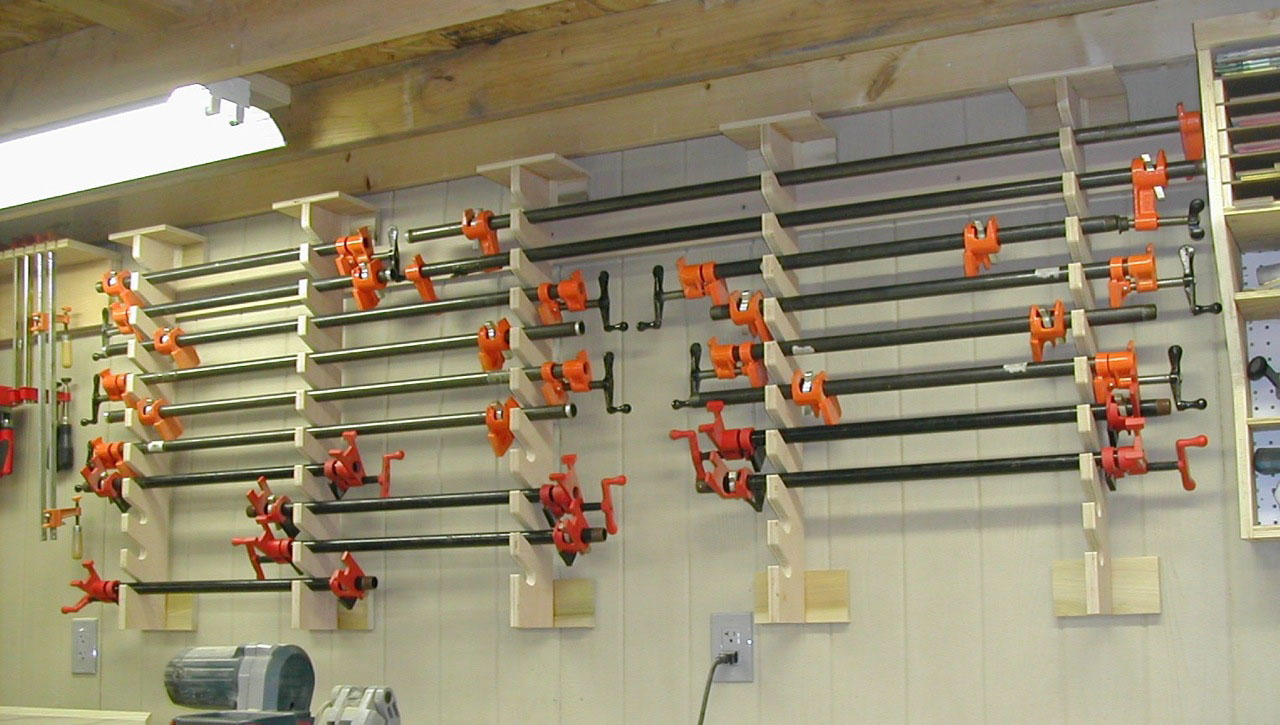
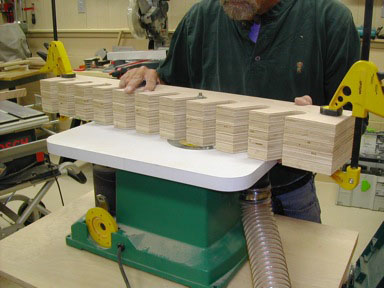
Figure 2 - Horizontal storage proved to be the answer...
more clamps, less wall
space, better arrangement,
easily re-configurable. Build these in a day!
|
I envisioned a number of matching fixtures that could hang from the pinch cleat, be easily
repositioned, and that would have matching notches for horizontal storage of my pipe clamps.
Eventually the clamps I use the most would migrate to the lower storage notches, and the lesser-used
clamps would be at the top.
Having been doing carpentry, plumbing, and electrical work for the past six months, making these
clamp racks seemed like a good way to ease back into woodworking, tune up some tools, and use up
some accumulated scrap material.
From the landing that was built at the turn in my stairs, I had a nice big leftover piece of 1/4"
"cabinet grade" birch-faced plywood. Plywood is excellent for shop fixtures, as it is stable,
strong, and reasonably priced. I also gathered up some scraps of dimensional stock 1 X 4 poplar
that I had used for trimming out windows and doors.
To store pipe clamps horizontally, I needed to figure out how much space would be needed between
clamps. I measured the clamp mechanisms, lined clamps up on the floor, and tried several
configurations. I sketched how the clamp racks might look, and "noodled" out how much support was
needed. When all was said and done, I figured the pipe clamps could rest in notches spaced on
approximately three-inch centers. This might necessitate me having to alternate the direction each
clamp was hung to accommodate the larger crank mechanism at one end, but it would give me the
optimum compromise between space and convenience.
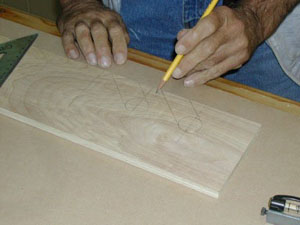
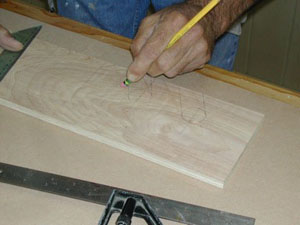
I grabbed a piece of scrap plywood and started to draw a layout. Three-quarter inch black pipe
is one inch in its outside diameter, so I decided to make the slots and resting places for the
clamps 1 1/8" wide. I guessed at a good distance from the edge, drew a line down the board parallel
to that edge, then ticked off a couple of 3-inch on-center locations. Then, using a compass, I drew
in a couple of 1 1/8" circles. I figured I would simply drill out a hole, saw from the edge to the
hole to form a notch, and be done.
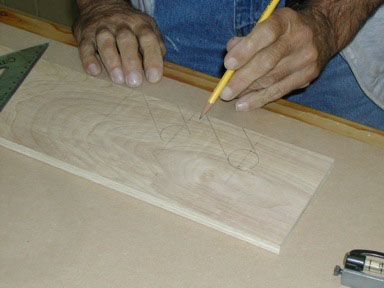
At first I drew the lines connecting the circle and the board edge at a 45-degree angle. Looking
at it, this seemed to make the "arms" of the support notches too thin. I changed to a 30-degree
angle, and things looked better --- thank goodness for erasers!
|
|
Figure 3 - At 45 degrees, the support arms were too
skinny and close
together.
|
Figure 4 - At 30 degrees, the support arms were wider
and the space between
them was bigger.
|
When making repeated drawings on a work piece errors can creep in, particularly when drawing
circles. My compass doesn't hold a setting very well. To avoid that, I measured carefully and
marked the holes' center locations, then on the drill press, drilled partial holes at each location
using a 1 1/8" bit. Then, using the partially cut holes, I lined up my bevel angle gauge and drew
lines from the edge of each hole to the edge of the board.

|
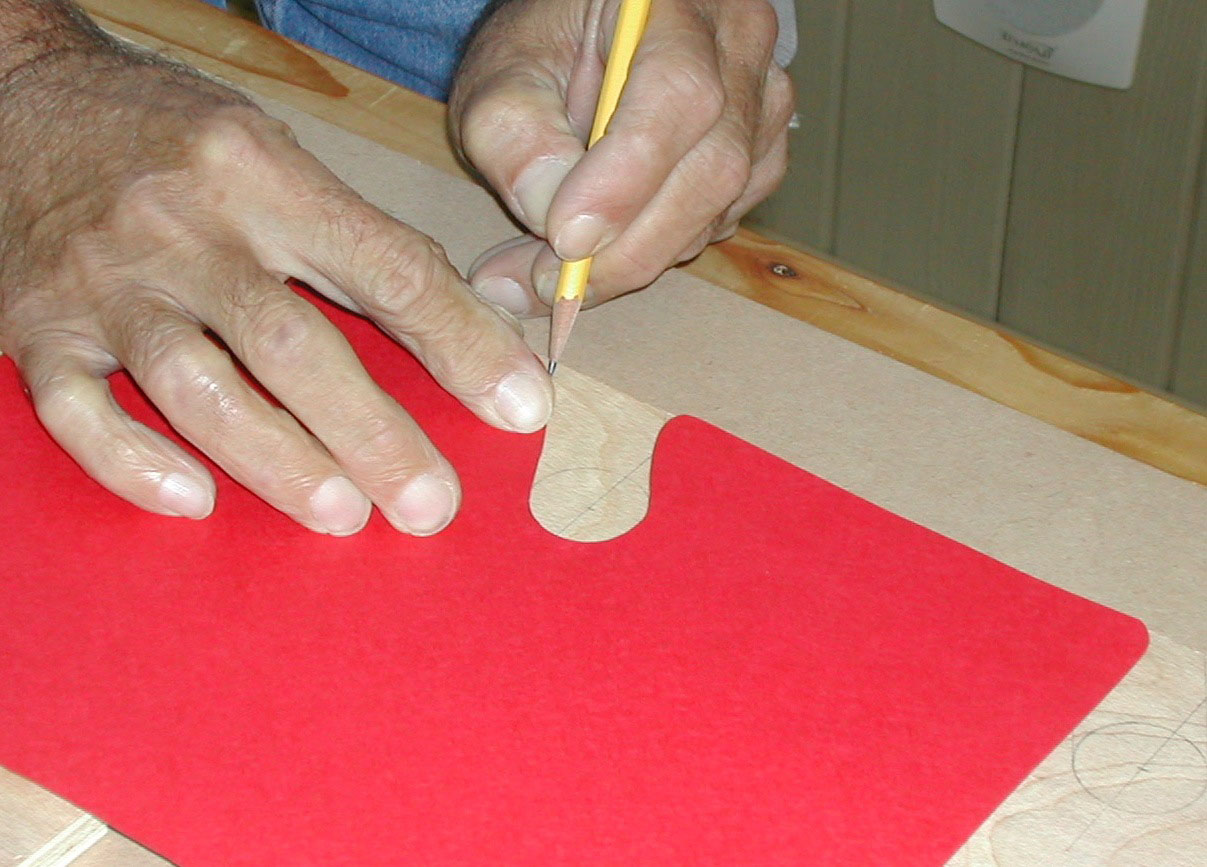
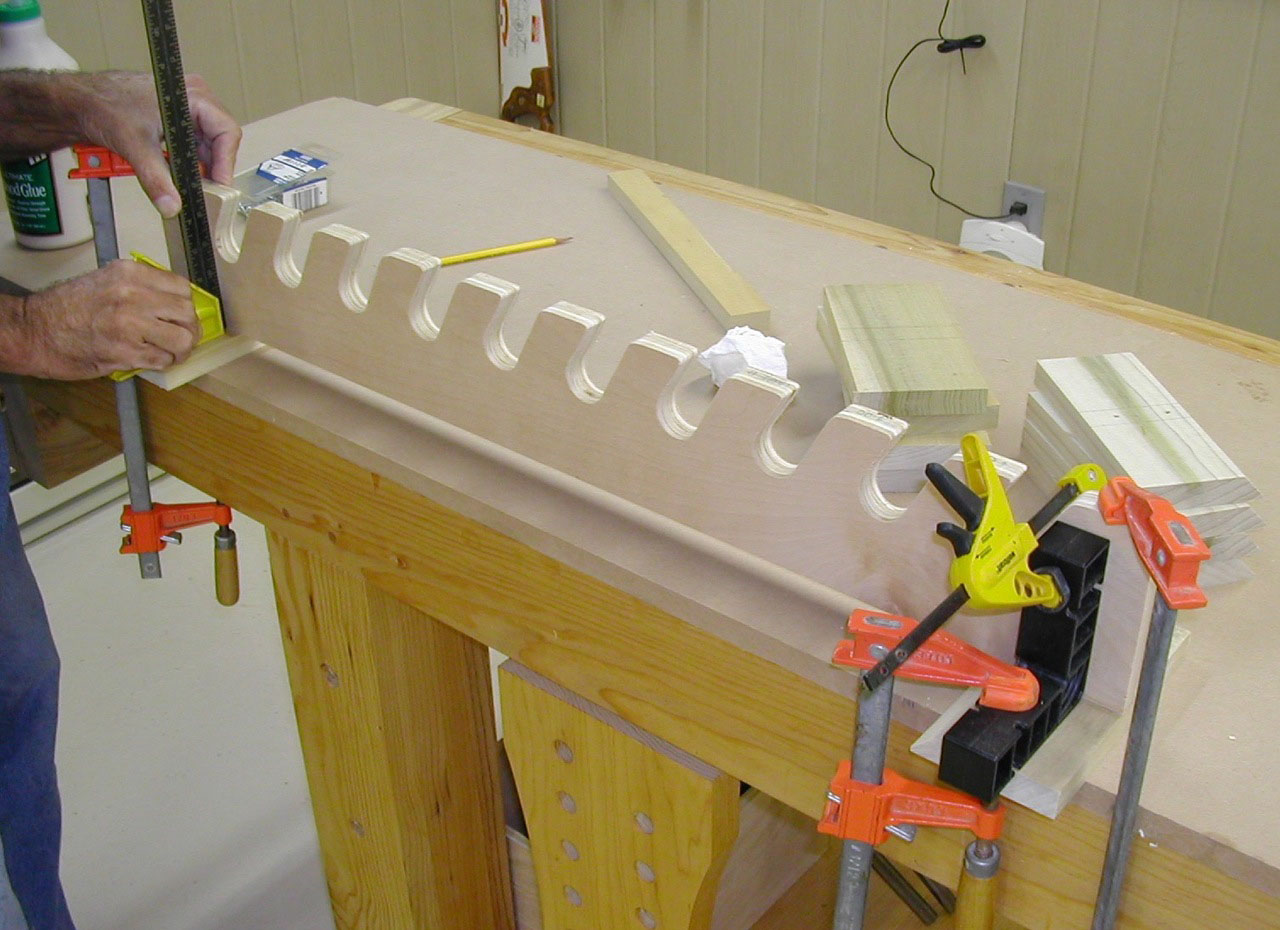
Figure 5 - These curves "soften" the points of the support arms
and make it
easier to insert the clamps for storage.
|
I cut some pleasing looking curves into some card stock, and used that to mark out curves on my
template piece where the sharp points of the notches would need to be "eased."
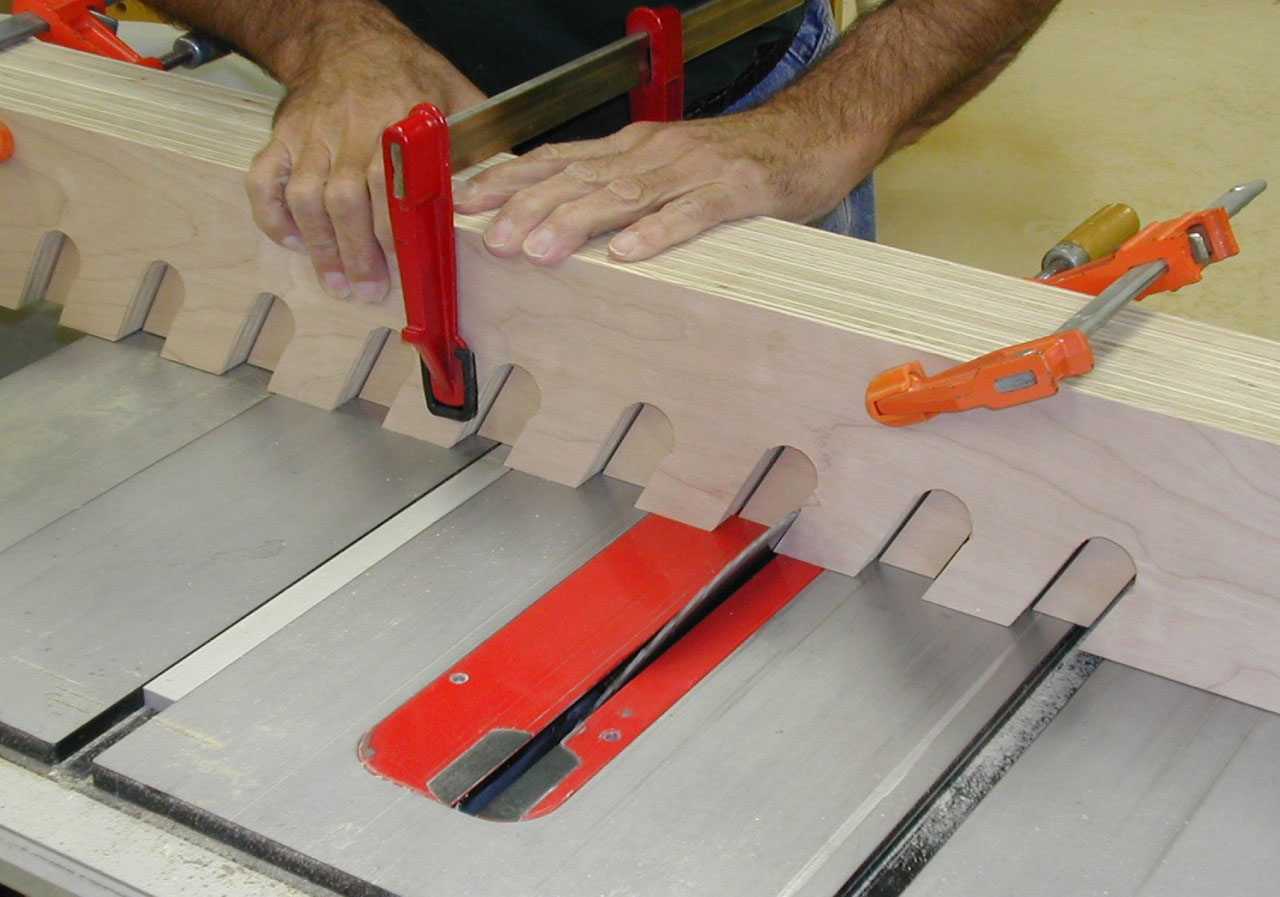
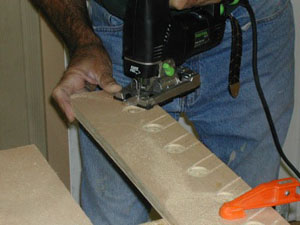
There are a number of different ways to cut out the pipe clamp support arms. The pieces were a
bit long to get into my band saw sideways, but I could use a jigsaw or a scroll saw. I could cut a
template, and then use a router to cut out all the matching parts. Ultimately, I decided to cut one
complete support arm as a template and use a combination of my tablesaw and drill press to rough-cut
all the pieces together. I think this method turned out to be the fastest, and produced the most
consistent results.
|

|
Figure 6 - Saw straight into the edge of the partially
drilled hole. Later,
all the holes can be drilled at once to
assure perfect alignment between support arms.
|
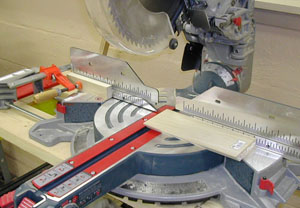
Figure 7 - The template makes aligning the saw blade
easy, and the tablesaw
makes quick work of sawing
five identical pieces.
|
First, I carefully cut out one complete support arm using my Festool jigsaw. I then used the
oscillating drum sander to smooth the lines and add the curve at the pointy end of each cutout.
Double-sided tape was used to securely stack the parts with my "go-by" template on top.
With an auxiliary/sacrificial fence on my miter attachment, and the blade positioned at 30
degrees, I ran the stack through the table saw and cut the longer leg of each cutout. I then
lowered the blade a bit, and cut the shorter leg. If you have a tablesaw sled, use that...it will
definitely be safer.
After the straight portion of each support leg was cut, I moved the stack to my drill press and
used the same 1 1/8" bit to drill the rest of the way through. Go slowly here. Clearing the chips
frequently and allowing the bit to cool a bit will give you less tearout and cleaner holes.

|

|
Figure 8 - Drill all the pieces together to assure alignment
between adjacent
pipe clamp racks. Go slow, clear the
chips frequently and allow the bit too cool.
|
Figure 9 - This could be done by hand, but the oscillating
spindle sander makes
quick work of smoothing and rounding.
|
When everything was cut, I moved back to the oscillating spindle sander and sanded the whole
stack until it matched the template on top.
Make the pinch cleats and standoff pieces next. Set the table saw for a 45 degree cut and move
the fence into position. I use dimensional 1 X 4 hardwood (this time poplar, sometimes I use oak)
nominally 3 ½" wide. I always like to have a small "flat" along the edge of the 45-degree cut so
that the two cleat pieces can fit very snugly together, even if there is some dirt or dust in the
crevice. I used to make a 45-degree rip cut, then slice off a smidgen (a sixteenth of an inch or
so) to produce the flat. By using constant-size dimensional lumber you can eliminate the second cut
by positioning your rip fence so that the 45-degree rip leaves that small flat. Long ago I saved a
scrap to use as a set-up template. I just slide the rip fence over until it matches the scrap and
every pinch cleat in my shop is exactly the same width.
I used a stop block to make sure that all the pinch cleats and standoffs were cut to the exact
same length, in this case, 6-3/4".
|

|
Figure 10 - Stop block assures uniform length cuts.
Note the annoying adhesive
label on this dimensional
lumber is positioned as waste - anyone know a good
way to
remove these things?
|
Figure 11 - Use care to get everything square. Thirty
minutes or so in the
clamps, then turn the units over
and drive the screws from the back.
|
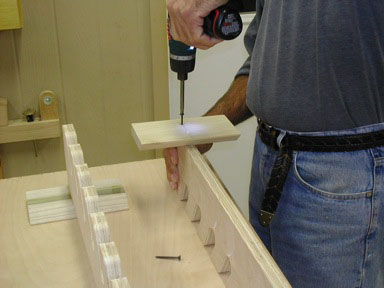
Glue and plywood together do not make a strong butt joint. Unless you are gluing into a dado,
which was way too much pomp for this circumstance, mechanical fasteners are needed to provide the
strength for a hundred or more pounds of black iron pipe and clamp heads. I wanted to make sure
everything was straight and square, so I glued first, clamped everything up square, and let the glue
set for about thirty minutes. I then released the clamps and ran screws in through the back of the
cleat and into the plywood rack through pre-drilled and countersunk holes.
We woodworkers are a frugal bunch and hate to waste wood. The cut-off from ripping pinch cleats
is a perfect little triangle of wood. I have used dozens of these as "stickers" between stacks of
wood, and they work great. This time, I put the little buggers to use as corner braces between the
pinch cleat at the clamp rack support arm – just a little insurance, like wearing a belt and
suspenders!
The standoff at the bottom of each clamp rack exists simply to hold the rack at the same distance
from the wall as the pinch cleat. It does not bear any weight, so I glued those in place and used
23 gauge pins to hold them while the glue dried.
I let everything sit overnight and then gave each unit a light sanding. I didn't bother with
applying a finish as these are strictly utilitarian...but if I had, I probably would have just
applied a coat or two of shellac.
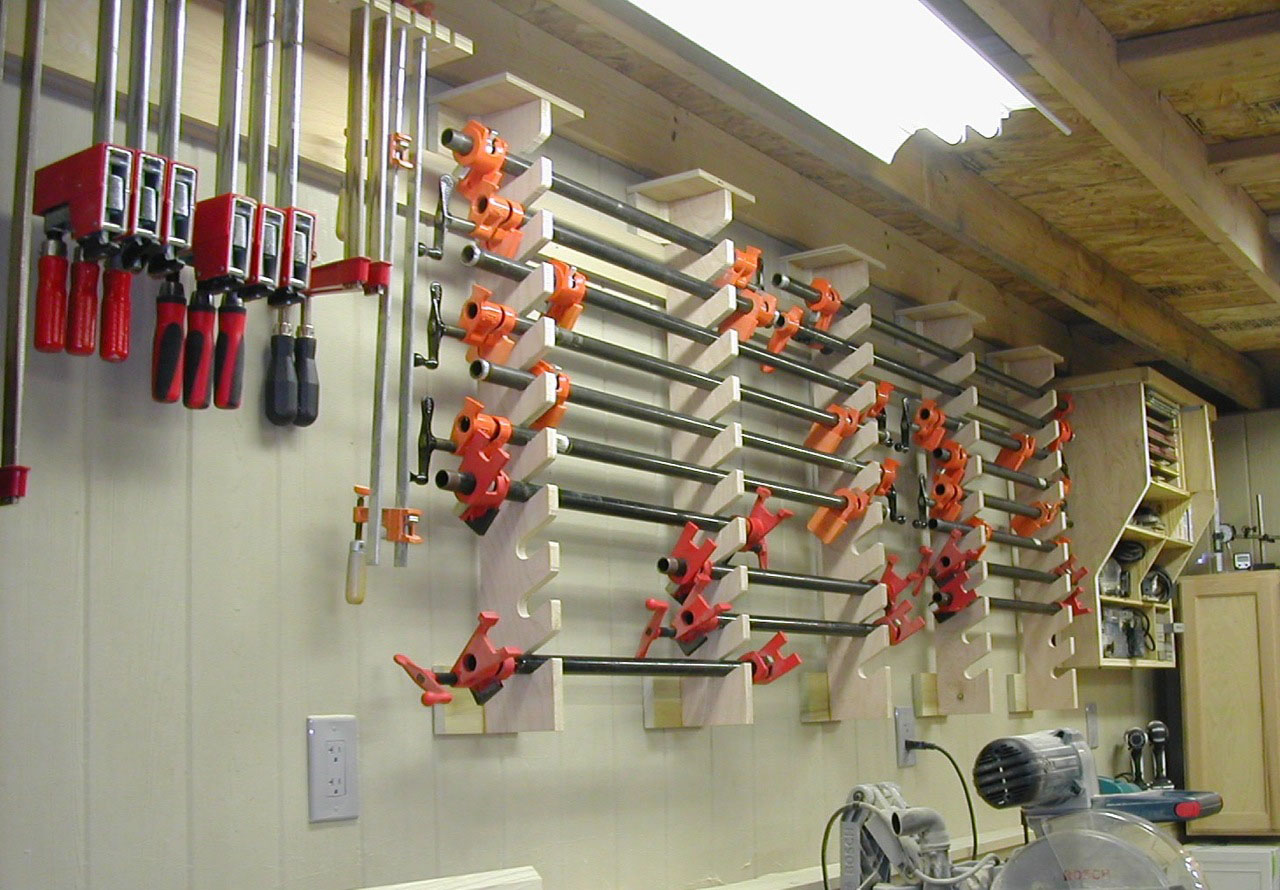
The units can be hung at any distance from one another that accommodates your personal collection
of pipe clamps. I spread mine so that the longest clamps would rest on three supports. Then I
filled in with shorter clamps across two supports. The clamps I use the most are closest to the
bottom, the more infrequently used clamps are on top.
I will soon replicate these, but with narrower and more squared-off notches, to accommodate a
variety of bar clamps (seen hanging vertically in the photo). After a few weeks of use, I really
like the horizontal storage system better than my old vertical storage. One advantage is that the
most-used clamps are closest to the bottom and easiest to access. When all my clamps were hanging
vertically it didn't really matter where each one was located on the rack --- they were all equally
hard to access.
After a couple of weeks I discovered an "unintended consequence" --- actually a benefit --- of
horizontal storage. When you hang a bar clamp vertically, the head ratchets itself all the way to
the bottom by gravity. When I am doing repeated glue ups, I can leave the clamps set in their
respective positions, store them horizontally between assemblies, and they do not move. It may just
be seconds, but it definitely saves time.
(Page 1 of 2)
1
2
Next Page
Return to
Wood News
front page