 by Steven D. Johnson
Racine, Wisconsin
(Page 3 of 4)
Previous Page
1
2
3
4
Next Page
Perfection Is Overrated
The mortise and tenon joint is a mainstay in my shop, and probably in yours, too. Conventional mortise and tenon joints with all their myriad permutations are great for all kinds of connections like aprons to legs, rails to stiles, and more. And there are scores of ways to make this versatile joint.
Big mortises I chop by hand. The bigger the mortise, the easier it is to do well using a chisel and mallet. For small mortises, though, I use a bench top hollow chisel machine. With just a little set up time, I can make beautiful, smooth, square mortises, precisely located on the work piece with a minimal amount of exertion and little forethought.
Tenons, though, I always cut by hand. I like cutting tenons by hand. I can get pretty close, and then tweak the fit with a shoulder plane, chisel, or even a little sandpaper. For some unknown reason, last week I decided to abandon my tried and true methodology and attempt to make tenons on the router table. It seemed straightforward and easy to execute. Just like a table saw and dado blade crafted tenon, it seemed that a router-made tenon would be more "perfect" than my hand-cut version. Plus, sometimes feeling adventurous, I just want to do something differently. I may also have been partially influenced by a bad case of "rubber arms," having just hand planed the rail and stile stock square and true from some very rough, but beautiful boards.
Making perfectly uniform tenons via mechanical means required me to rethink the way I make mortises. Since my normal individual custom fitting would not be necessary or even possible with precise machine-made tenons, each mortise would have to be exactly the same – size, placement, everything. "Perfect," right?
Normally I simply mark the top and bottom of the mortise, get the chisel aligned in the approximate center of the board, and start making square holes. I then use those mortises to mark out lines for cutting the tenons. With machine made tenons, though, I would have to get the mortise placement right.

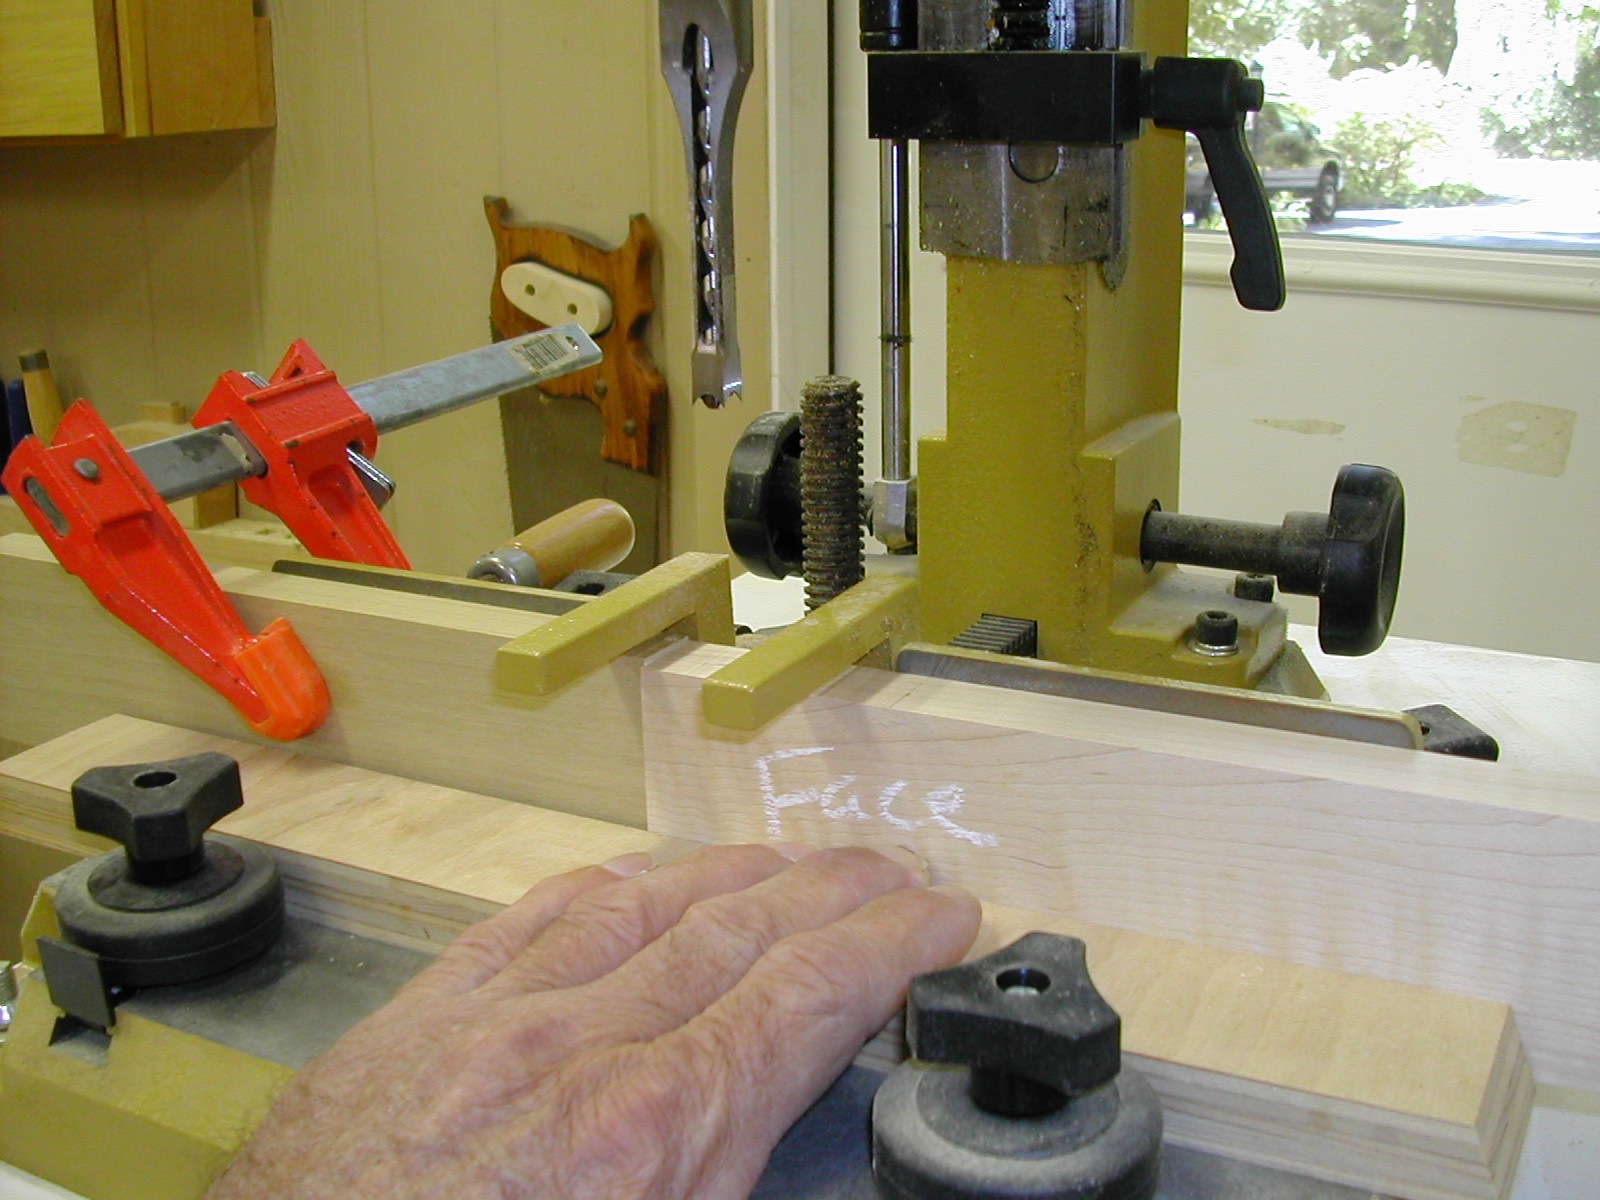
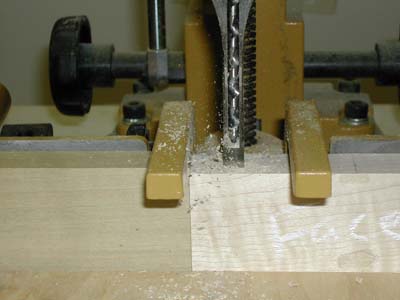
|
Figure 7 - The clamped-on stop block will
index the first plunge, defining the
outer limit of the mortise.
|
The first order of business was to decide the distance from the end of the stile where I wanted each mortise to start, and then assure that it was the same on both ends of both stiles. The distance needed to match the depth of the short shoulder on the tenon I would be cutting, since I wanted all edges of the rails and stiles to be flush in the finished project.
To accomplish that, I clamped a stop block in the mortising machine to define the first plunge. That stop block, however, meant that to get the end-of-board to start-of-mortise distance to match on both ends of the stile, I would need to turn the work pieces 180 degrees. On one end of the stile, the face of the work piece would be against the mortising machine's fence, and when I made the first cut in the other end, the face of the work piece would be away from the fence.
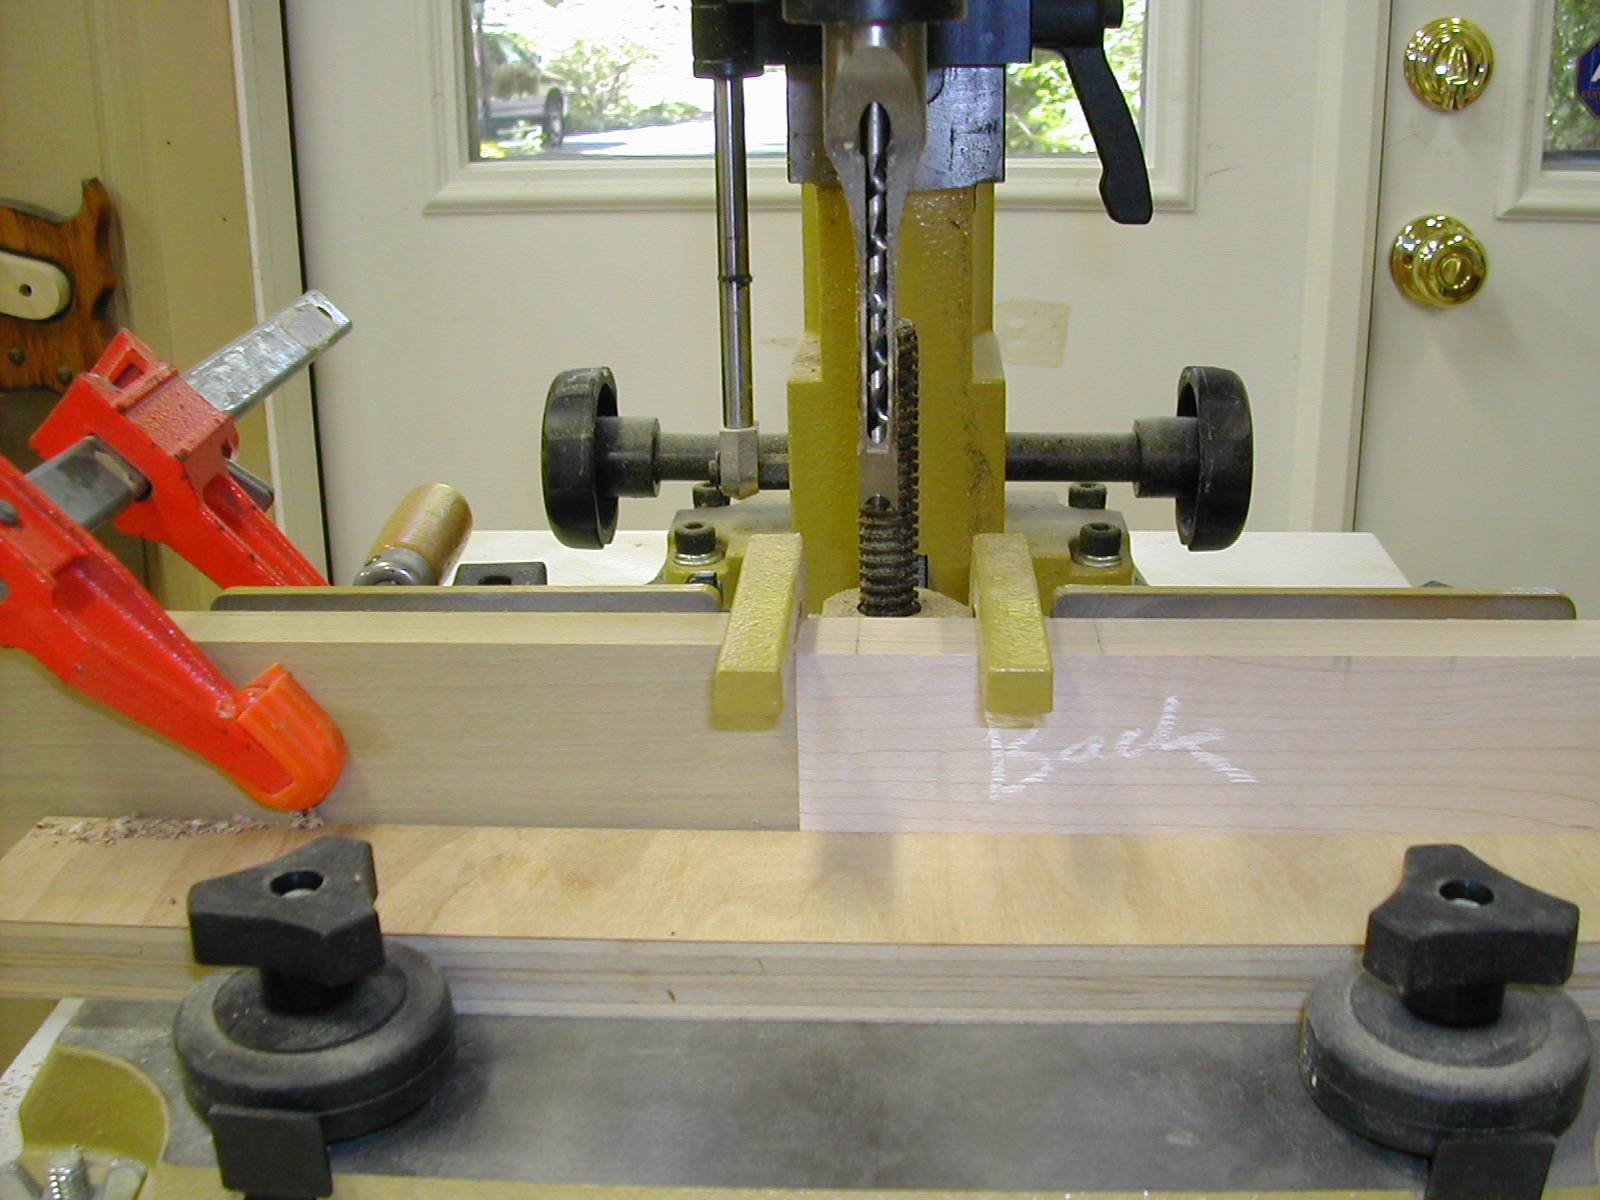
|
Figure 8 - With the workpiece flipped end-for-end, a
different face is against the fence. The mortise has to
be positioned dead center between the board edges.
|
The stop block also made it possible to make only one plunge cut in each end of each board to define the location. After doing that, I could remove the stop block and finish the mortise cuts. The fact that the board would be flipped end-for-end to make the distance-defining first cuts required the mortise to be in the dead absolute center of the work piece from edge-to-edge. Otherwise, there would be unsightly misalignments when the joints were assembled. Getting that setup correct took seven or eight test cuts. From cutting my freshly dressed stock to length, I had eight pieces of scrap that matched the rails and stiles...I was beginning to wonder if I had enough test pieces. Finally, though, I got it, and everything looked pretty good.
With no scrap left, and no extra work pieces cut, there was more than just a little anxiety, so as is so often the case, I took a break, had a cup of coffee, and thought it all through again.
Yep, end-of-stile to top of mortise distance set...check. Cut the first square hole with the show face of the stile toward the machine fence...check. Cut the second alignment hole in the other end of the board with the non-show face against the fence...check. Repeat for the second stile...check. Remove the stop block and finish cutting all four mortises...check. I ran the whole operation through my mind, rehearsed my every move.
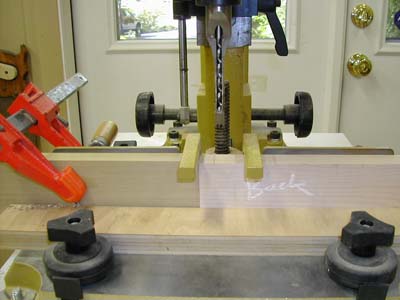
|
Figure 9 - All set...chips flying,
making the index plunge.
|
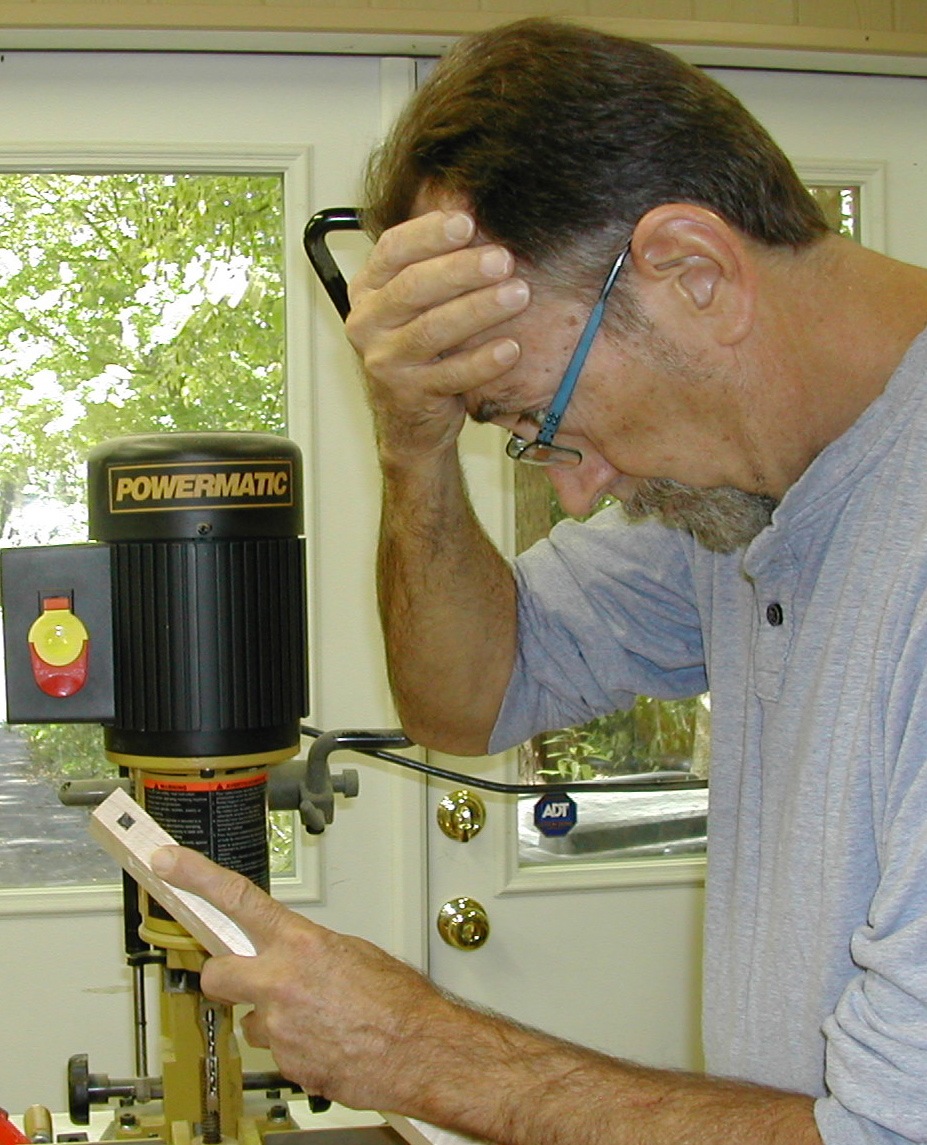
Finally, with a warm coffee glow and a slight caffeine buzz, I grabbed the first board and cut the first square alignment hole...beautiful. I flipped it end-for-end and cut the second hole...perfect. I checked the edge-to-edge measurements and it was centered...perfect. I checked the distance of the hole to the end of the...uh oh...colorful language...I just cut perfect square holes in one of the rails, not the #@&X*# stile!

|
Figure 10 - This is my "What did I just do?" face.
Perfect hole...wrong board.
|
Perfection is really overrated. After spending a couple of hours planing new rail stock to match the stiles, I returned to my tried and true method. It may not be "perfect" but it's "perfect enough." Maybe I will try making tenons at the router table some other time!
(Page 3 of 4)
Previous Page
1
2
3
4
Next Page
Return to
Wood News
front page