 by Steven D. Johnson
Racine, Wisconsin
(Page 3 of 3)
Previous Page
1
2
3
The Science (and Art) of Comfortable Lighting
|
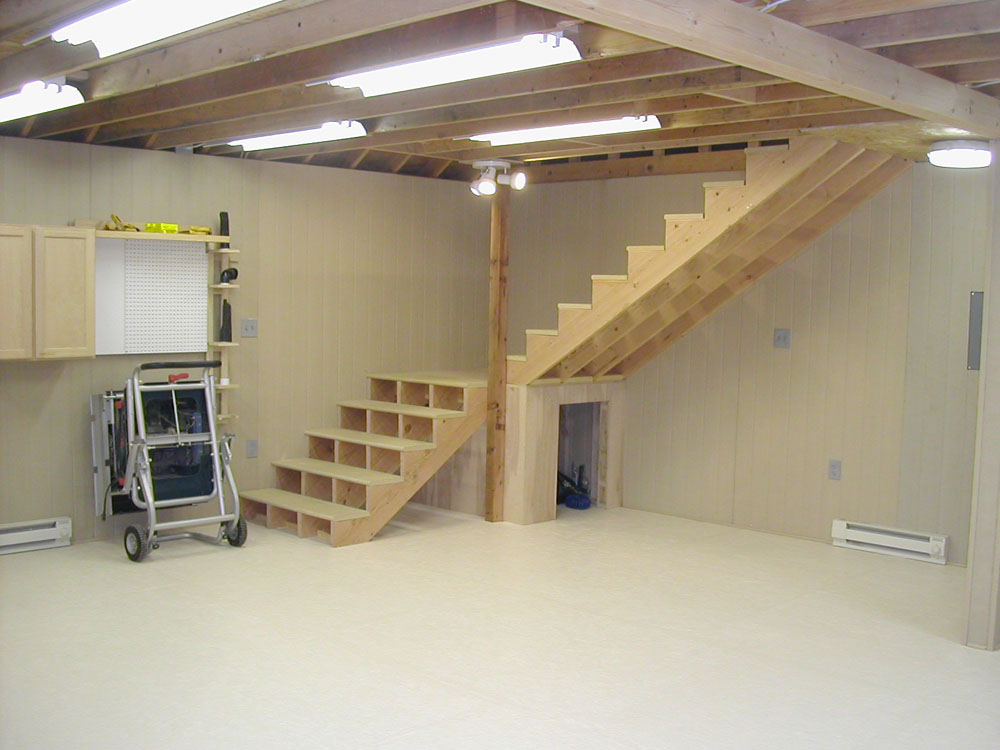
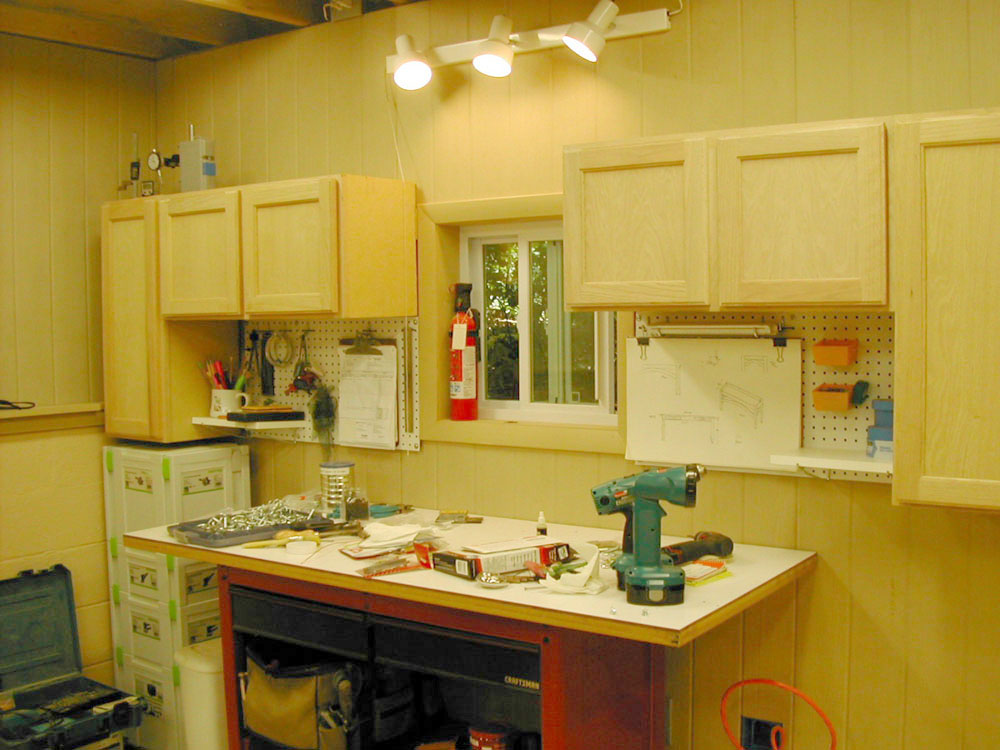
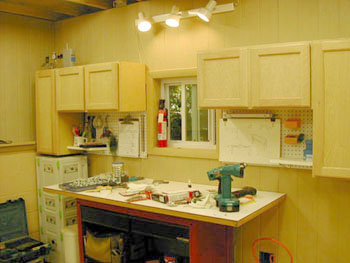
Figure 11 - Lighting looks okay now, but note the dark
walls... this causes an effect called "tunneling."
|
I love words and the most recent object of my affection is paralipsis, a word so obscure that my
computer's spell check wants to "fix" it. It is a word particularly apropos in the political
season, as it describes a literary or verbal technique of drawing attention to something while
professing to pass over it. An example might be, "No one is suggesting my opponent is dishonest..."
which means, of course, that "I am suggesting..."
Hundreds of articles have been published describing techniques for workshop lighting. Most are
either exercising "deliberately concise treatment of a topic, that much of the significance is being
omitted" as one definition of paralipsis goes, or the authors are brilliantly encouraging us to look
deeper into the subject ourselves, using paralipsis as "a rhetorical device in which an idea is
emphasized by the pretense that it is too obvious to discuss."
Regardless, all the articles left me wanting...no...needing more.
One of the better of the dissertations is a chapter in
"Great
Workshops"
. The article covers, as do many others, the basics of light measurement (measured in
foot candles), the formula for fluorescent strip placement (space rows apart no more than 1.6 times
the distance from the strip to the work height, i.e. your bench top), the differences between
fluorescent bulbs (T8s, T12s, etc.), and includes a good primer on ballast design. I recommend it
as a good starting point. Yet, for truly pleasing, optimal lighting, you need more.
For the few days that the shop was essentially complete, but equally essentially empty, the
artificial light from eleven fluorescent strips seemed more than adequate. But with all the
equipment on the floor and many tools and cabinets hanging from French cleats around the wall, the
lighting became less pleasing.

|
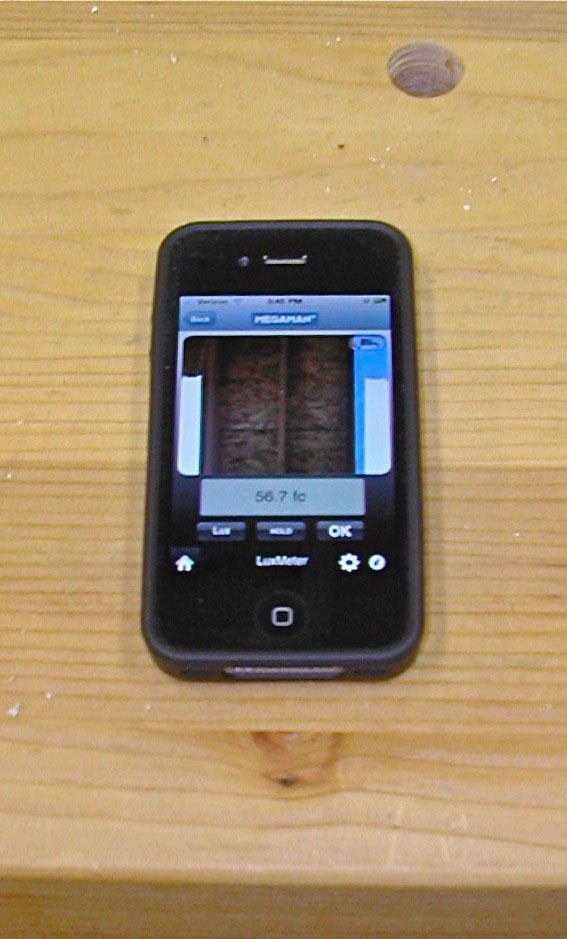
Figure 12 - Note the shadows on either
side of my phone. This photo was
taken without a flash, so those
shadows are from the overhead lights.
|
Standing over the workbench, I noticed shadows on two sides of everything lying on the bench.
Looking across the shop, there was a bit of distracting glare, and something kept directing my eyes
down and toward the center of the room. There was a lot of light, but somehow it didn't seem
entirely pleasant. Was my design bad? Did I have too many lights? Not enough? Was it bad Feng
Shui? What is going on?
Initially the inclination was to surmise that the cause was my eyes, not the lights. After all,
lights are lights, right? As long as there was enough light, according to the formula, and the
lights were spaced correctly, according to the formula, all should be well. So it must be that
pesky deterioration of the macula, the central part of the retina, that can begin to occur naturally
with age and that can be exacerbated or accelerated by a plethora of external factors, including
long term exposure to bright sunlight.
It is also true that as we age, our pupils get smaller and less responsive. A smaller pupil does
not let in as much light, and the slower response is the reason mature eyes have more difficulty
adjusting to changing light conditions. Older drivers often complain about oncoming lights when
driving at night. Chalk that up to eyes that are slower in adjusting from dark to bright and back
to dark.
There is a condition known as photophobia, which is not, as I thought, an unnatural fear of
photographs, but rather an abnormal sensitivity to light. I'm no hypochondriac, but I began to
think I might suffer from this as well.
Having had an eye exam only a few weeks ago, a call to my ophthalmologist confirmed there was
nothing unusual going on with my eyes or vision. There simply had to be more to this lighting issue
than (sorry) meets the eye. Time to dig in and do some research.
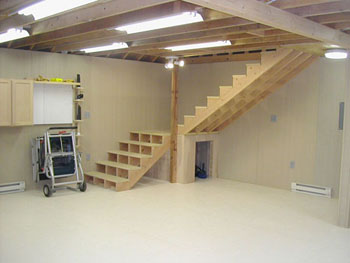
|
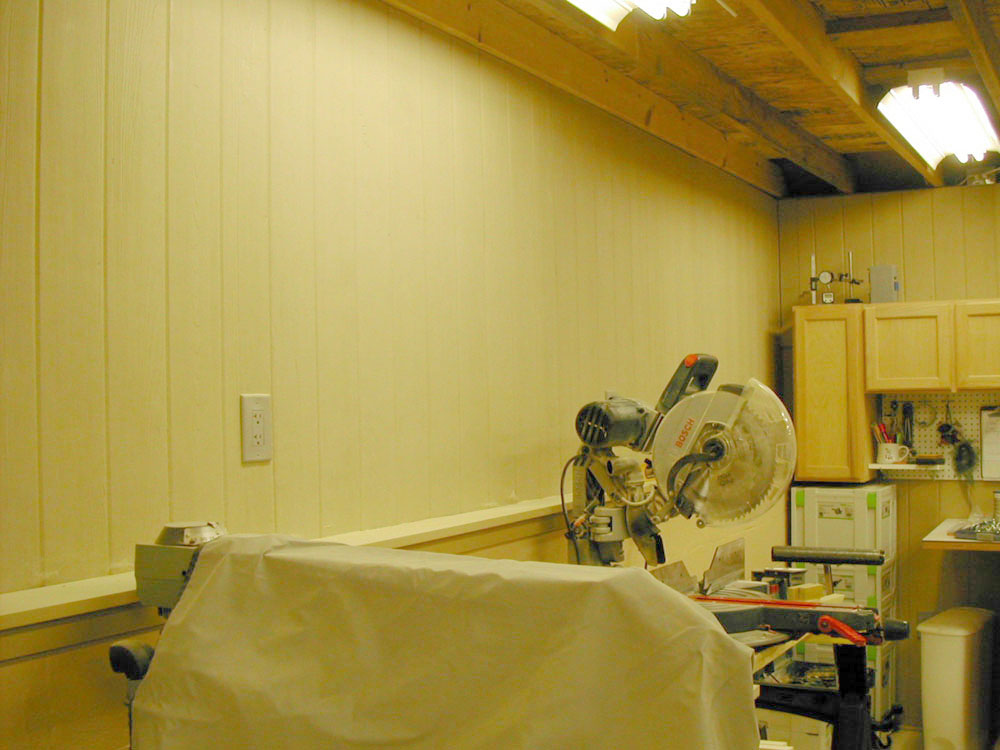
Figure 13 - Simply moving the overhead fluorescent strips
closer to the wall provided much needed light on the walls
and eliminated the "tunneling" effect.
|
It turns out, lighting is a science and a subject far too complicated and extensive to cover in
this column. There are countless scions of the subject, a virtual drawer full of doctoral
dissertations, and the internet is awash with white papers. Interspersed are thousands of pseudo
science papers that are little more than thinly veiled advertisements for products or services.
Instead of wading deeply into this murkiness, read on, and I will reveal a few critical omissions
from most of the previous articles on workshop lighting and a few cheap, quick fixes that could well
make your shop a more comfortable, safe, and pleasant environment. I am now the self-appointed
scion of workshop lighting!
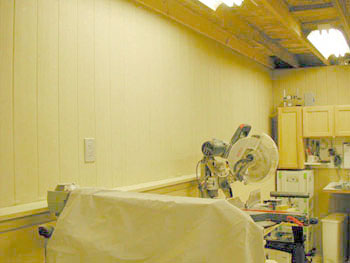
|
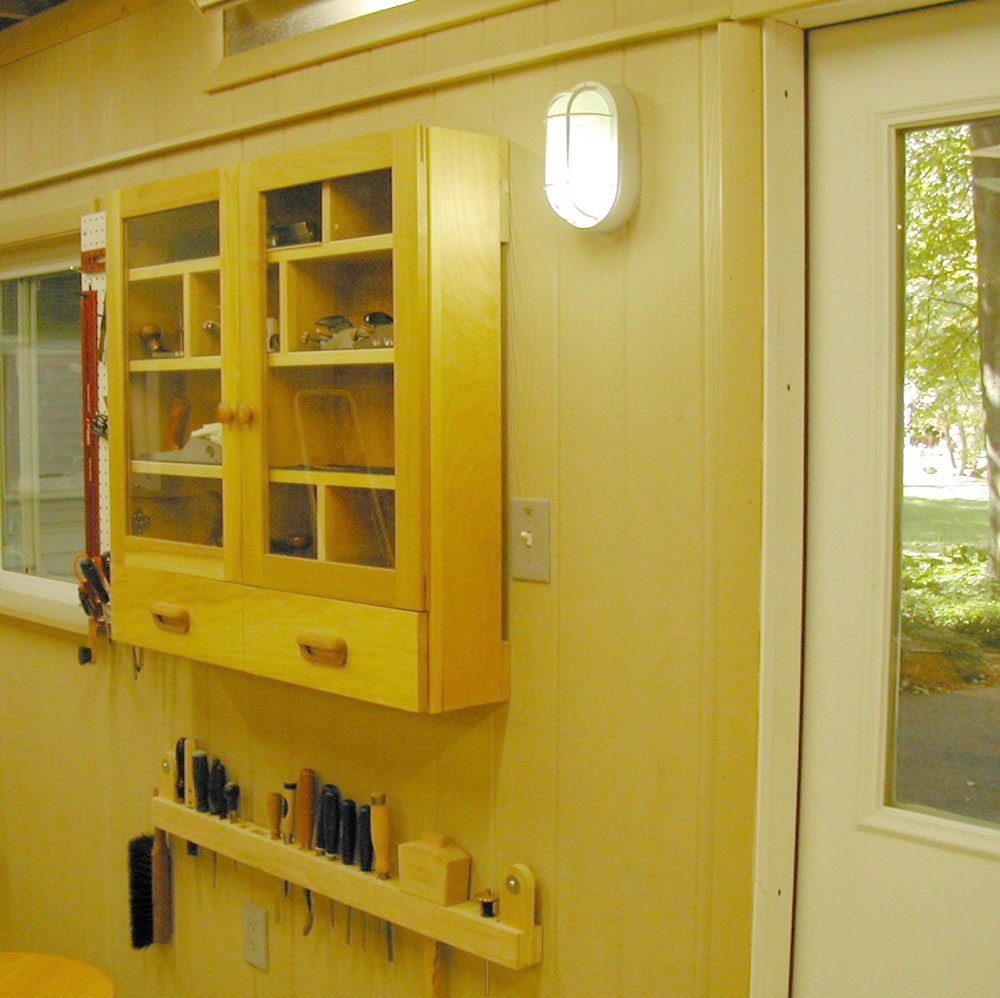
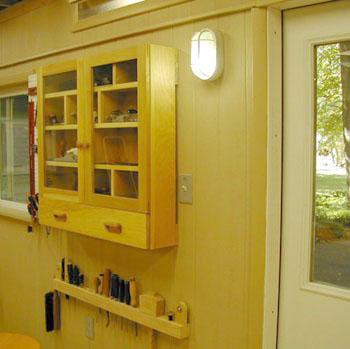
Figure 14 - Here a cheap wall sconce lightens a wall and
helps negate some glare from outside light.
|
The first issue that is seldom, if ever, addressed is described as "tunneling." Rows of lights
running through your shop can create "tunnels" of light. If the walls are not also washed with
light, this "tunneling" effect can be distracting and unpleasant. The medium-to-light tan walls in
the Down To Earth Woodworking shop reflected a good bit of light when the shop was empty, but with
the shop full and darker tools, racks, and cabinets hung on the walls, they reflected less and less
light. The subtle tendency to look down or toward the center of the room was an autonomic response
to this tunneling effect. By simply repositioning three of the previously installed fluorescent
fixtures, I was able to throw a little more light on two of the walls and eliminate the problem.
This is often referred to as "wall washing" with light. Sconces, up-lights, and even high-intensity
spotlights can be used, too.
As many of the articles and literature suggested, I originally aimed for 50 to 100 foot candles
of light on work surfaces. A foot candle (FC) is the American way of measuring luminance on a
surface. A foot candle equals one single lumen of light density per square foot. I know we have a
lot of readers in the metric world, so you will measure light in "lux," which is one single lumen of
light per square meter.

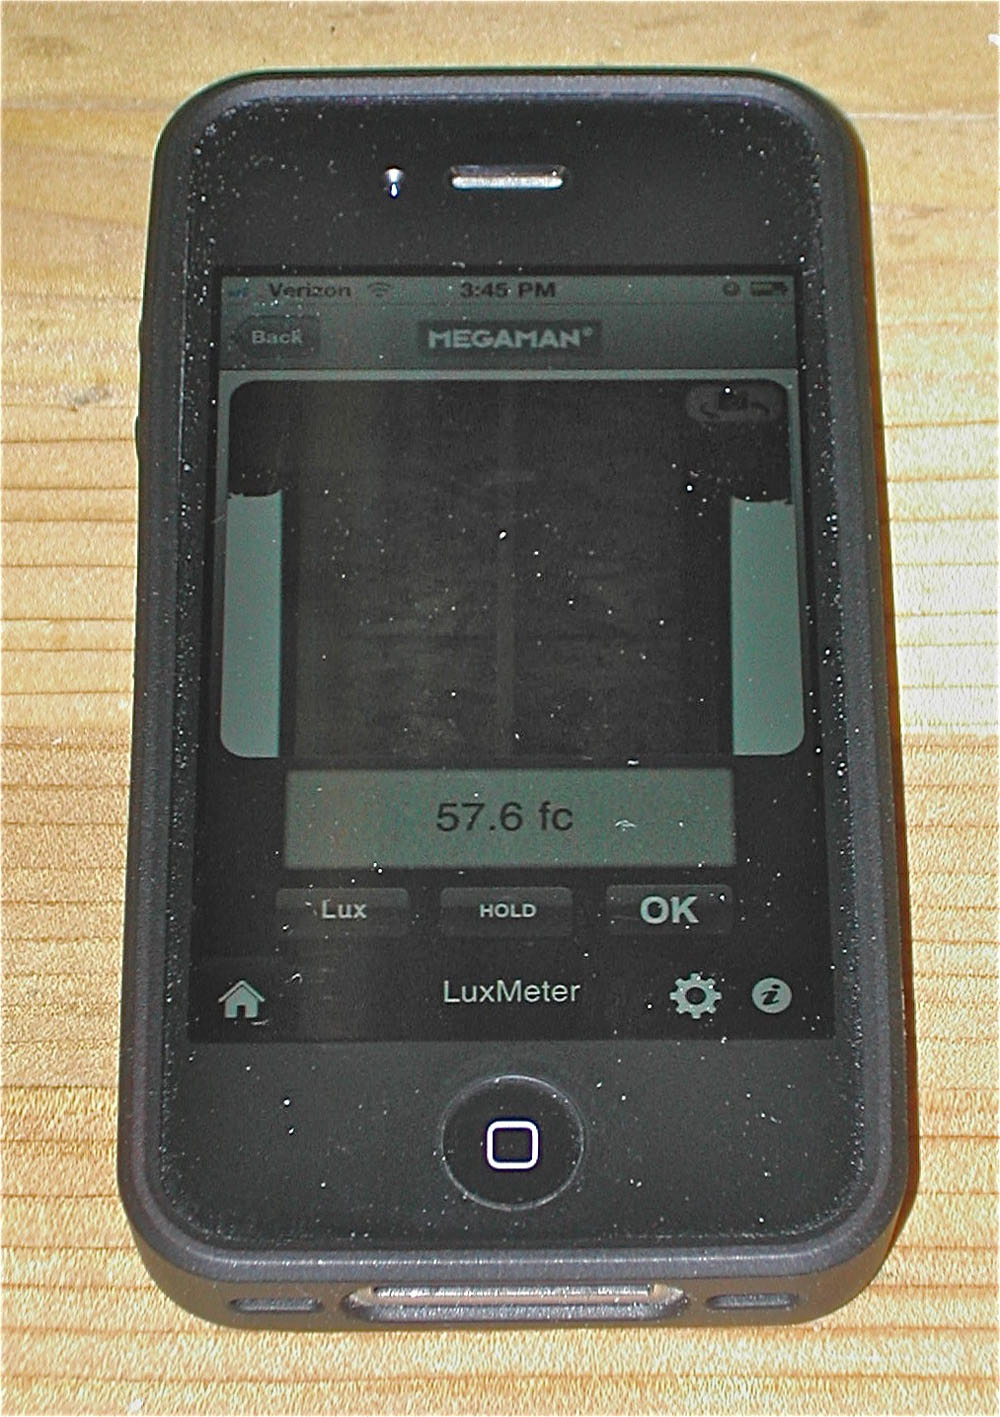
|
|
Figure 15 - The Luxmeter app on my iPhone.
|
If you do not have a light meter (and who does?) don't despair. Download a free app for your
smart phone or tablet device. The one I installed is called Megaman Luxmeter. It uses the camera
in your iPhone, iPod Touch, or iPad and the light through the lens to provide accurate light
readings in Lux or FC. There are Android-based applications as well.
The "Great Workshops" lighting chapter recommends 50 FC if you are less than forty years of age,
and 100 FC if you are over 40. A bit strict in formula, it shortchanges the subject somewhat. OSHA
standard 1926.56(a) mandates a minimum of just 10 FC for "general construction plant and shops" and
30 FC for "first aid stations, infirmaries, and offices." An office design and ergonomics book
recommends a whopping 200 FC for offices, and yet another reference recommends 150 FC for surgical
suites. Easy to see, even with less than the recommended foot candles, that the subject of light
intensity can be confusing.
On my workbench, which is 36 ½" high, my readings were a fairly consistent 56 to 58 FC. On top
of the table of my Rikon band saw (at 42" from the floor) the FC reading was in the mid-sixties. My
highest reading was at the drill press, which has a high table and where I had also installed some
additional spot lighting. The lowest reading was at the mortising machine, whose table is too low
at 34" (a situation which I will be correcting soon). At its current height, only 30 FC illuminated
the surface. All of this measuring points out the very important factor of distance, light source
to work surface. All my fluorescent fixtures measure 96 ½" from the middle of the bulb to the
floor, so you can see how even minor differences in work surface height can dramatically impact the
amount of light. If you simply need more light in certain areas, and have the space, try lowering
the fixtures a bit.
|
Figure 16 - These spotlights wash the wall with additional
light, dilute the light on the bench to minimize shadows,
and add a few foot candles.
|
Another factor that will contribute greatly to lighting comfort, or lack thereof, is diffusion.
Harsh shadows can create overly harsh contrast that can in turn distract and fatigue, but the total
elimination of shadows can harm depth perception resulting in work inaccuracies and even accidents.
Take a look at the picture of my phone in "light meter" mode above, and look at the shadows cast to
either side of the phone. The shadows were the result of bright, non-diffused T8 bulbs in the
fixtures above the bench. We woodworkers don't care much for diffusers. They gather dust and
reduce light output, and make it more difficult to change bulbs. In this case, though, a diffuser
on the light would help remedy the situation. But there is another way. By adding some additional
light from yet another direction the shadows can be minimized through a dilutive effect. In
essence, we can dilute the effect of shadows by throwing more light on the object from a different
direction. Photographers and videographers do this all the time. But care should be taken that
shadows are not eliminated completely. In photography, the total elimination of shadows yields a
stark, depthless look.
I have since "repurposed" another light fixture removed from the "Unhandy House" and aimed its
three movable heads at the bench, much as I did at my other bench. The difference is amazing. If
you cannot adequately diffuse the light, try diluting it.
All of the articles in other magazines do a good job of describing the color output of various
light sources. The part they leave out is that the color of the light doesn't really mean much
until it hits something. We see objects as a function of the light reflected from those objects.
The reflected light has color that is attenuated by the object it strikes. Thus our perception of
the color quality of light can be changed without necessarily changing the light source. Think of
how the lights looked in your living room before and after your spouse decided to paint the walls
that trendy bold blue color.
A well-known kitchen designer told me he never allows a customer to select a finish for cabinets
until they take a sample home and look at it, for several days, in their current kitchen. He wants
them to see it under changing light conditions and their own changing physiological conditions. Are
you aware that your color perception changes from morning to afternoon, in response to your mood, to
your blood sugar level, to your hormones, and other factors? It's true.
To achieve truly pleasing lighting is a personal experience, and a little experimentation is in
order. I have tried, I think, every color temperature of fluorescent bulb made, and my most
pleasing combination is currently a mixture of warm bulbs (3,000 Kelvin rating), cool bulbs (4,200
Kelvin), and a few conventional tungsten filament bulbs. I know, I know...I may soon not be able to
buy conventional bulbs, but for now, the miniscule few in my shop are not single-handedly thawing
any glaciers and the combination produces color that suits me very well.
Light affects everything from productivity to safety to your general mood. If your shop lighting
needs a little tune-up, remember to throw some light on the walls, check the brightness at various
working heights and adjust as necessary, minimize (but don't completely eliminate) shadows with
diffusion or dilution, and experiment with color, either at the source of the light or by changing
the color of some major components of your shop. These fixes will cost almost nothing (except some
time) and could help you create a much more comfortable, productive, and even safer place to
work.
To see the finished Down To Earth Woodworking shop and some scenes from the move-in, be sure to
click
on this link for this month's video.
Next month, join me in my gradual re-immersion into the woodworking world as I re-hone my skills
with a neat shop storage solution.
(Page 3 of 3)
Previous Page
1
2
3
Return to
Wood News
front page